How to Configure SSL Passthrough
DigitalOcean Load Balancers are a fully managed, highly available network load balancing service. Load balancers distribute traffic to groups of Droplets, which prevents the health of a backend service from depending on the health of a single server.
When load balancing encrypted web traffic, there are two main configuration choices:
-
SSL termination, which decrypts SSL requests at the load balancer and sends them unencrypted to the backend via the Droplets’ private IP addresses.
SSL termination places the slower and more CPU-intensive work of decryption on the load balancer and simplifies certificate management. Traffic between the load balancer and its Droplets is secured by routing over the VPC network. However, if you host multiple customer applications in a single account or team, data could be readable by others on the private network. We recommend separating customers by team or using SSL passthrough instead.
-
SSL passthrough, which sends encrypted SSL requests directly to the backend, via the Droplets’ private IP addresses. This secures the traffic between the load balancers and the backend servers.
SSL passthrough distributes the decryption load across the backend servers, but every server must have the certificate information. You also can’t add or modify HTTP headers, so you may lose the client’s IP address, port, and other information contained in the
X-forwarded-*headers.
Backend Configuration for SSL Passthrough
Before you configure SSL passthrough on your load balancer, you need:
-
A registered domain name that you own. You can use any domain name registrar (for example, Namecheap or Omnis).
-
DNS records pointing from your domain to the load balancer. You can use DigitalOcean’s free DNS hosting service or another service of your choice.
-
One or more backend Droplets running an application configured for SSL. There are several options on how to create an SSL certificate and configure the backend application to decrypt HTTPS or HTTP/2 requests depending on the software you prefer to use. Here are some resources:
All of the Droplets you use with your load balancer need to have the same SSL certificate. After your setup works with one backend server, you can create an image of the first Droplet to use to create additional instances. Alternatively, you can use scp or rsync to copy the certificate files from one server to the next.
Once your domain, DNS records, SSL certificate, and backend Droplets are ready, you can add the passthrough forwarding rule to the load balancer.
Add the Load Balancer SSL Passthrough Rule
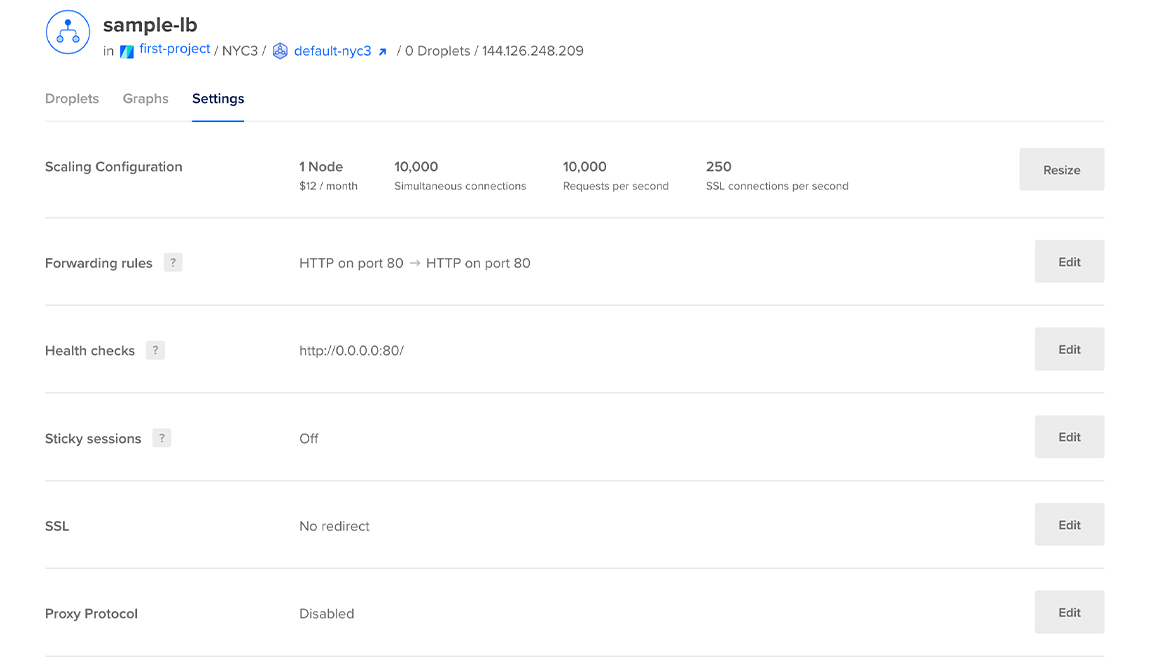
From the control panel, click Networking in the main navigation, then choose the Load Balancers. Click on the load balancer you want to modify, then click Settings to go to its settings page.

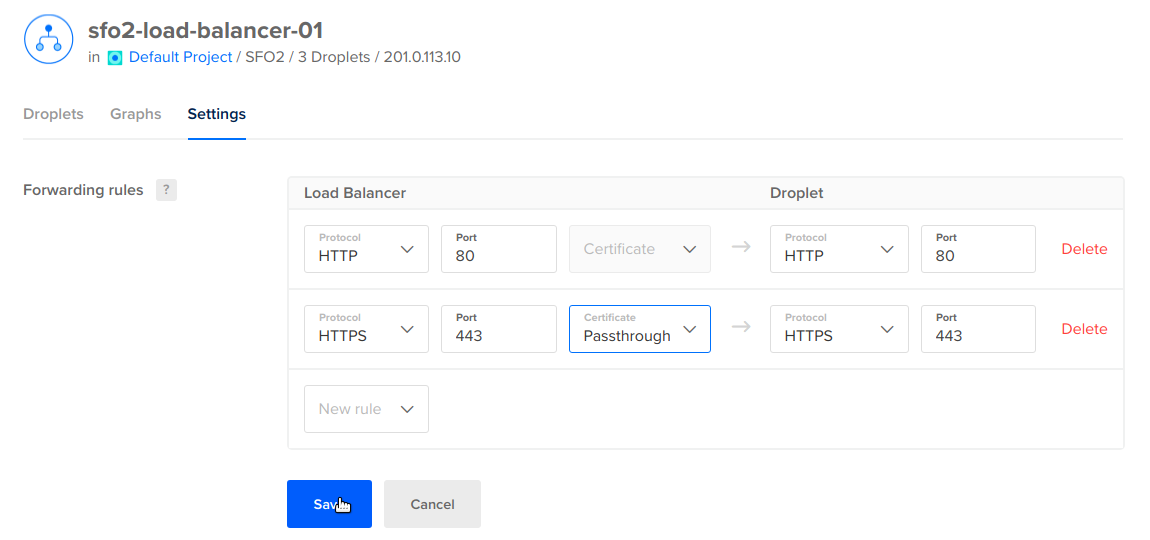
In the Forwarding Rules section, click Edit. You see any existing forwarding rules and an option to add additional rules.
Select the protocol and port the load balancer receives traffic on, and then select the protocol and port the Droplet receives traffic on.

After you click Save, you can test the SSL passthrough by visiting content on your domain in a browser using HTTPS.
Force SSL Traffic
If you would like to force visitors to connect over HTTPS for data integrity and security purposes, you can optionally redirect HTTP traffic to HTTPS. To redirect traffic, you need to set up at least one HTTP forwarding rule and one HTTPS forwarding rule. Any insecure connections made to the load balancer are redirected to use the certificate you loaded.
On the load balancer’s Settings page, find the SSL section and click Edit.

In the options that open, check the Redirect HTTP to HTTPS checkbox, then click Save.