
Workflows automate machine learning tasks, combining GPU instances with an expressive syntax to generate production-ready machine learning pipelines with a few lines of code.
Gradient Workflows provides a way to automate machine learning tasks. Workflows brings together powerful Gradient GPU instances with an expressive syntax to generate production-ready machine learning pipelines with a few lines of code.
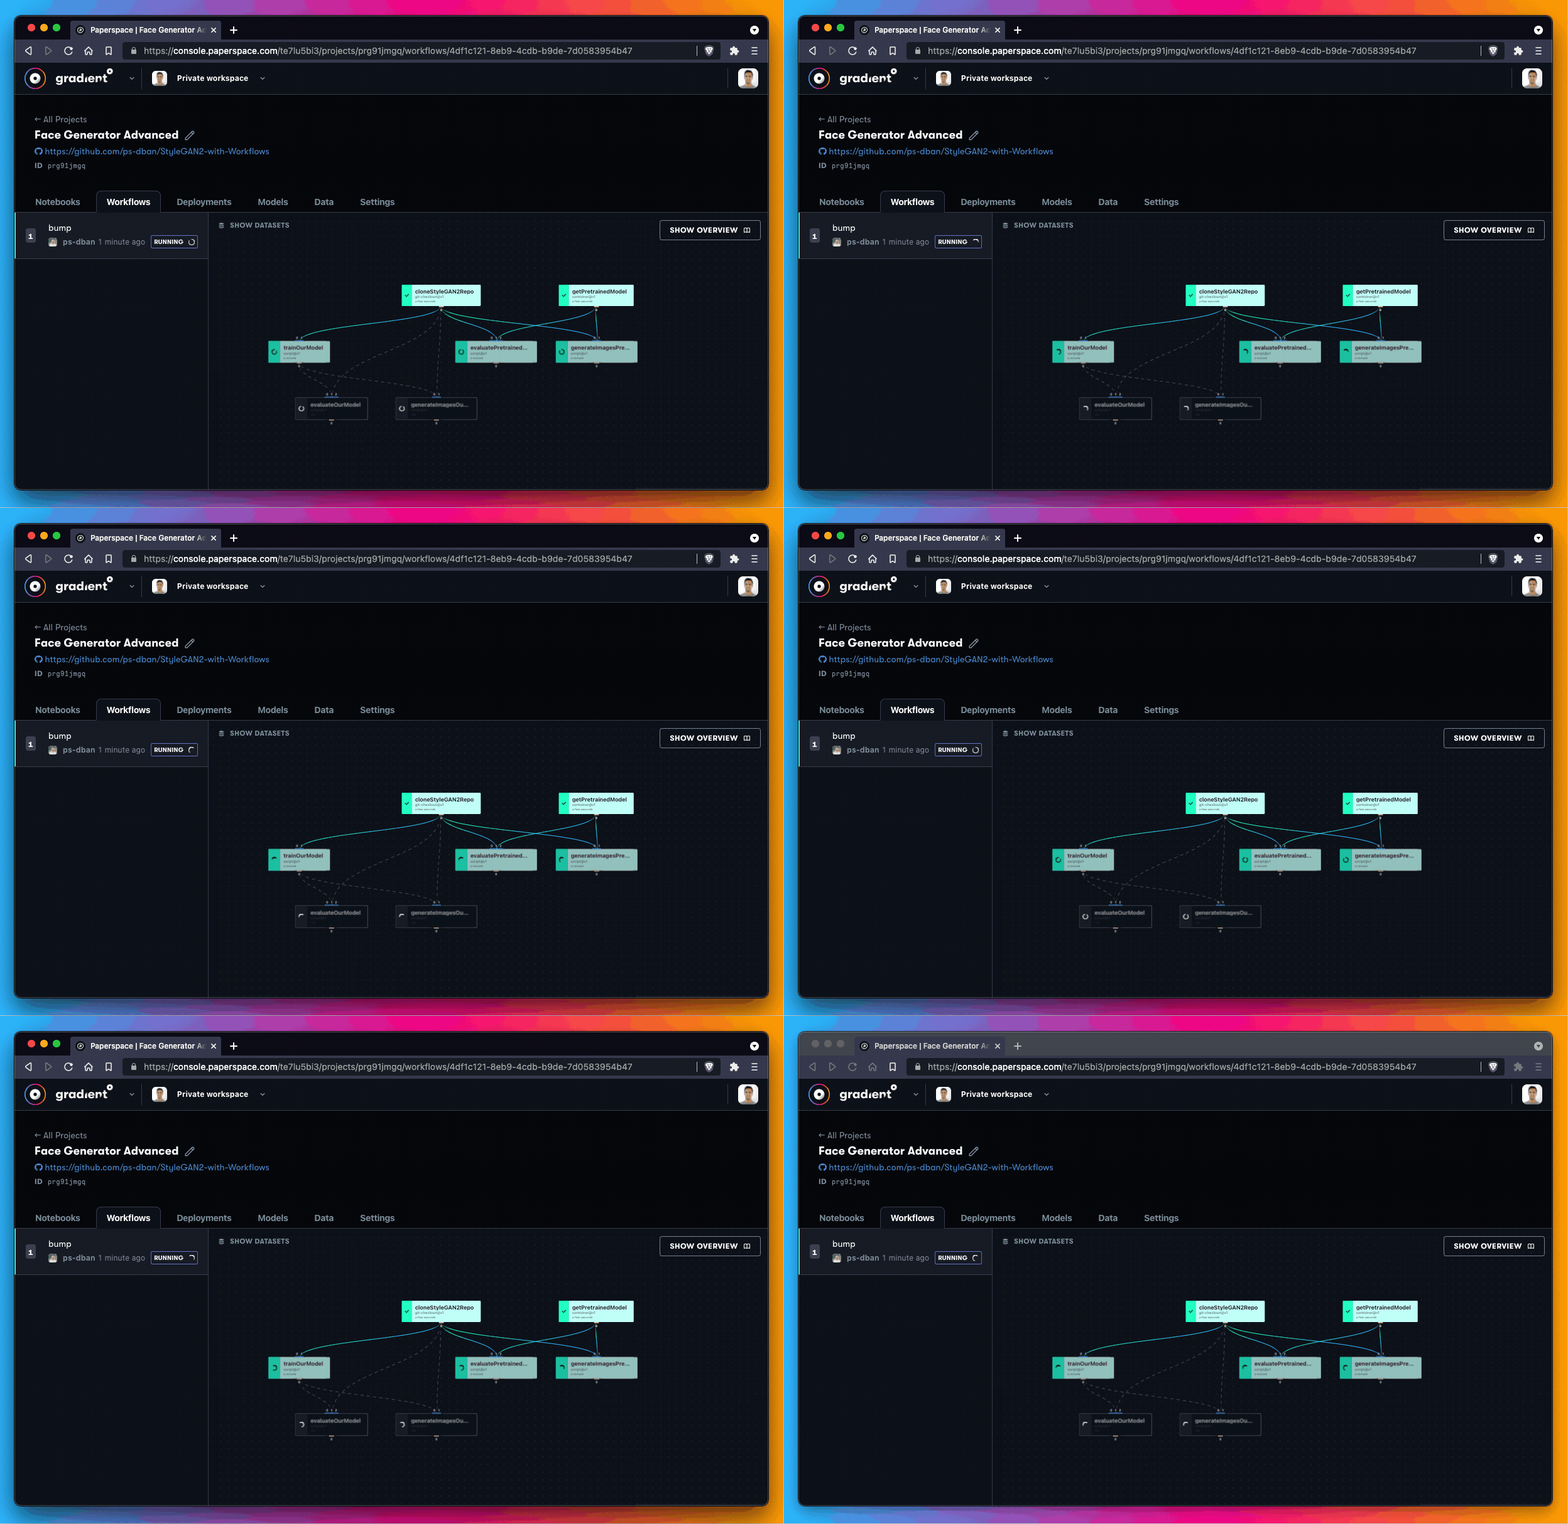
Gradient Workflows is based on Argo Workflows, which is an open-source and container-native delivery tool for Kubernetes.
Several MLOps platforms on the market promise the ability to define pipelines with code. What Gradient Workflows does best is allow us to manage multiple layers of complexity – from machine learning code, to development and production dependencies, to compute infrastructure such as GPU nodes and storage providers – all from a single pane of glass.
Here are some other features that distinguish Gradient Workflows from other MLOps solutions:
Don’t worry if this doesn’t make sense yet. Workflows has a steeper learning curve than Notebooks due to the natural complexities of shipping machine learning applications to production.
As you progress through the tutorial, start with a basic use case and add complexity gradually. This way, you can get a full understanding of workflows from a toy pipeline through to a production application that is deterministic, reproducible, and fit for external consumption.
The first task in this tutorial is to create and run a sample workflow on Gradient. You can use one of the starter workflows that Gradient provides in the console.
By the end of this section, you will have used a workflow to train a model to generate a realistic human face using StyleGAN2, which is a popular library for generative image modeling from NVIDIA.
This section uses the following steps:
If you haven’t already created a project in the Gradient console, you need to do that first. From the Gradient console, select Create A Project and give your project a name.
Name your project. In this tutorial, its name is Face Generator.
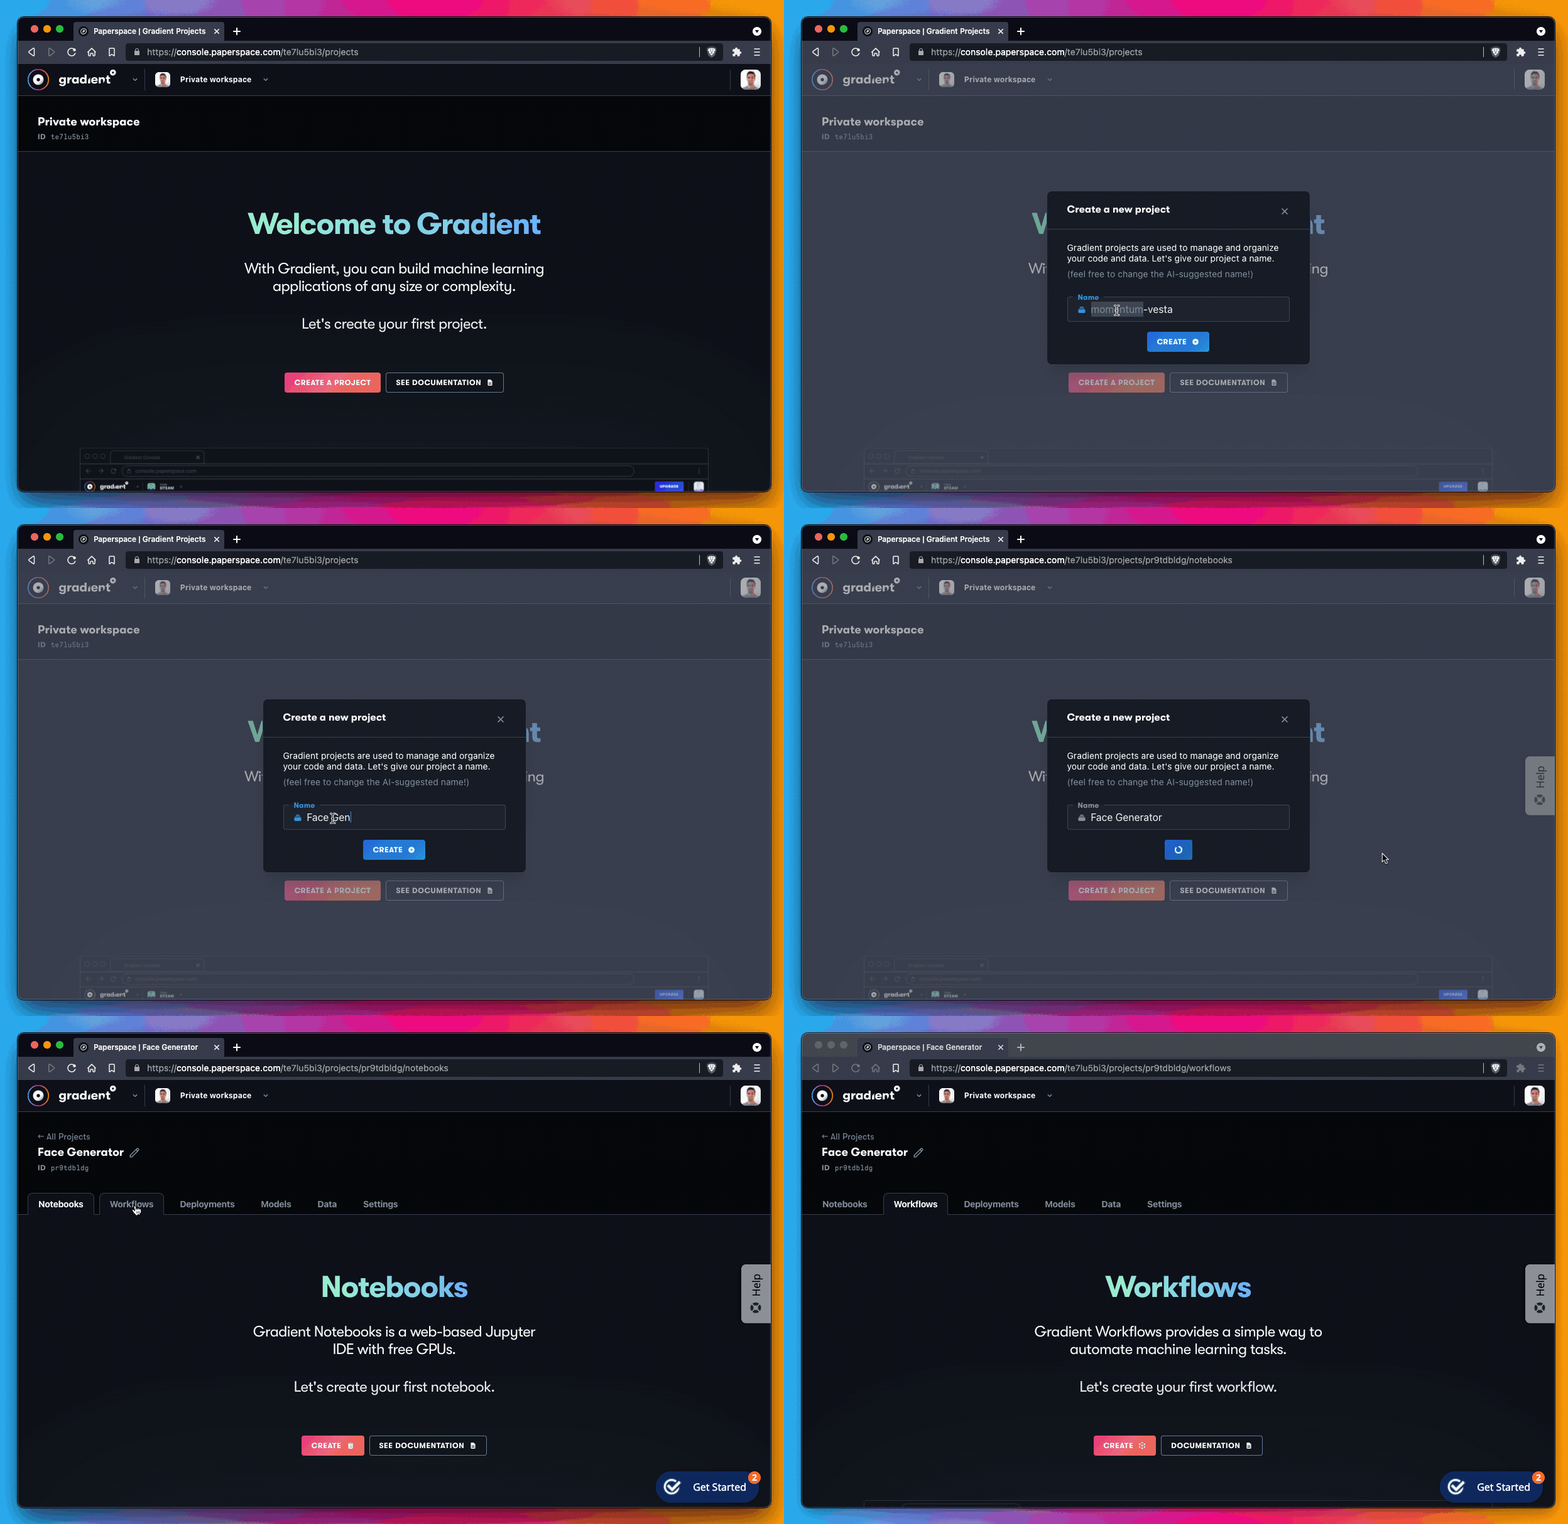
From the Workflows tab, select Create to initialize your first Workflow.
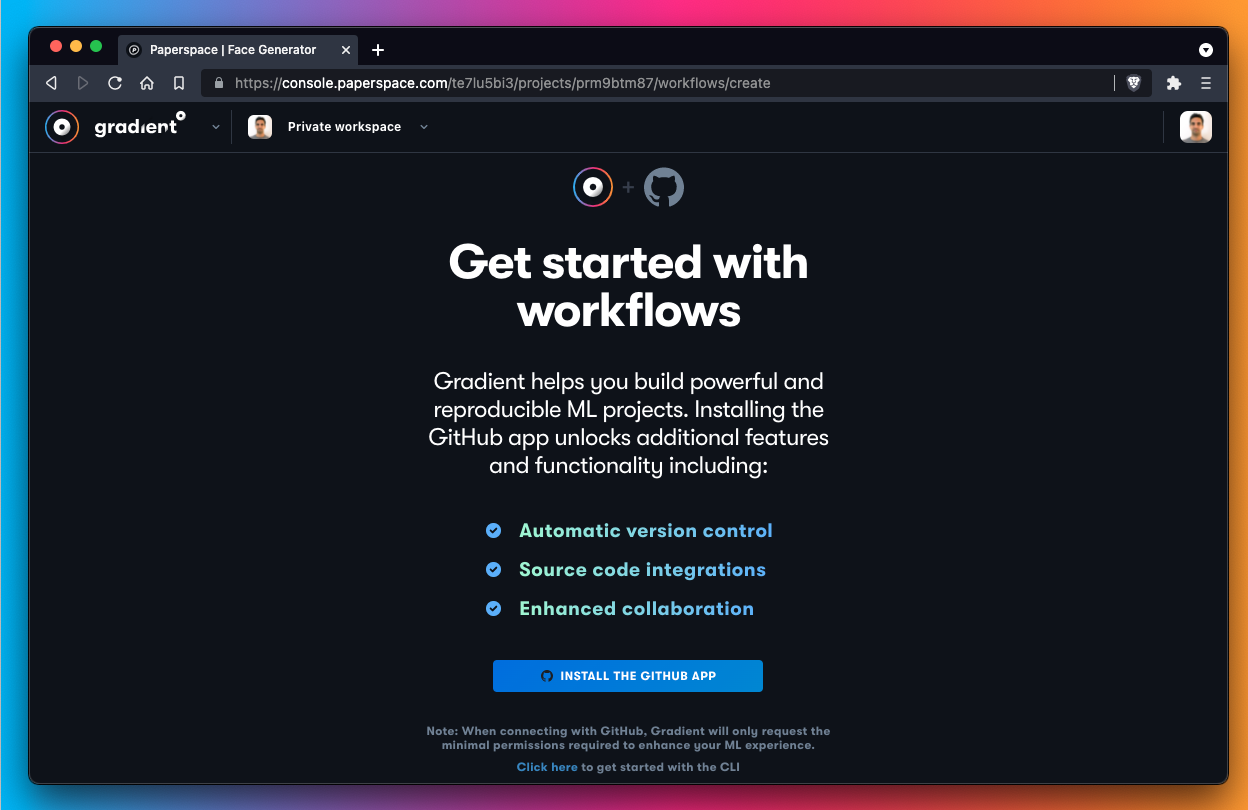
At this point, Gradient prompts us to grant access to GitHub if you have not already done so.
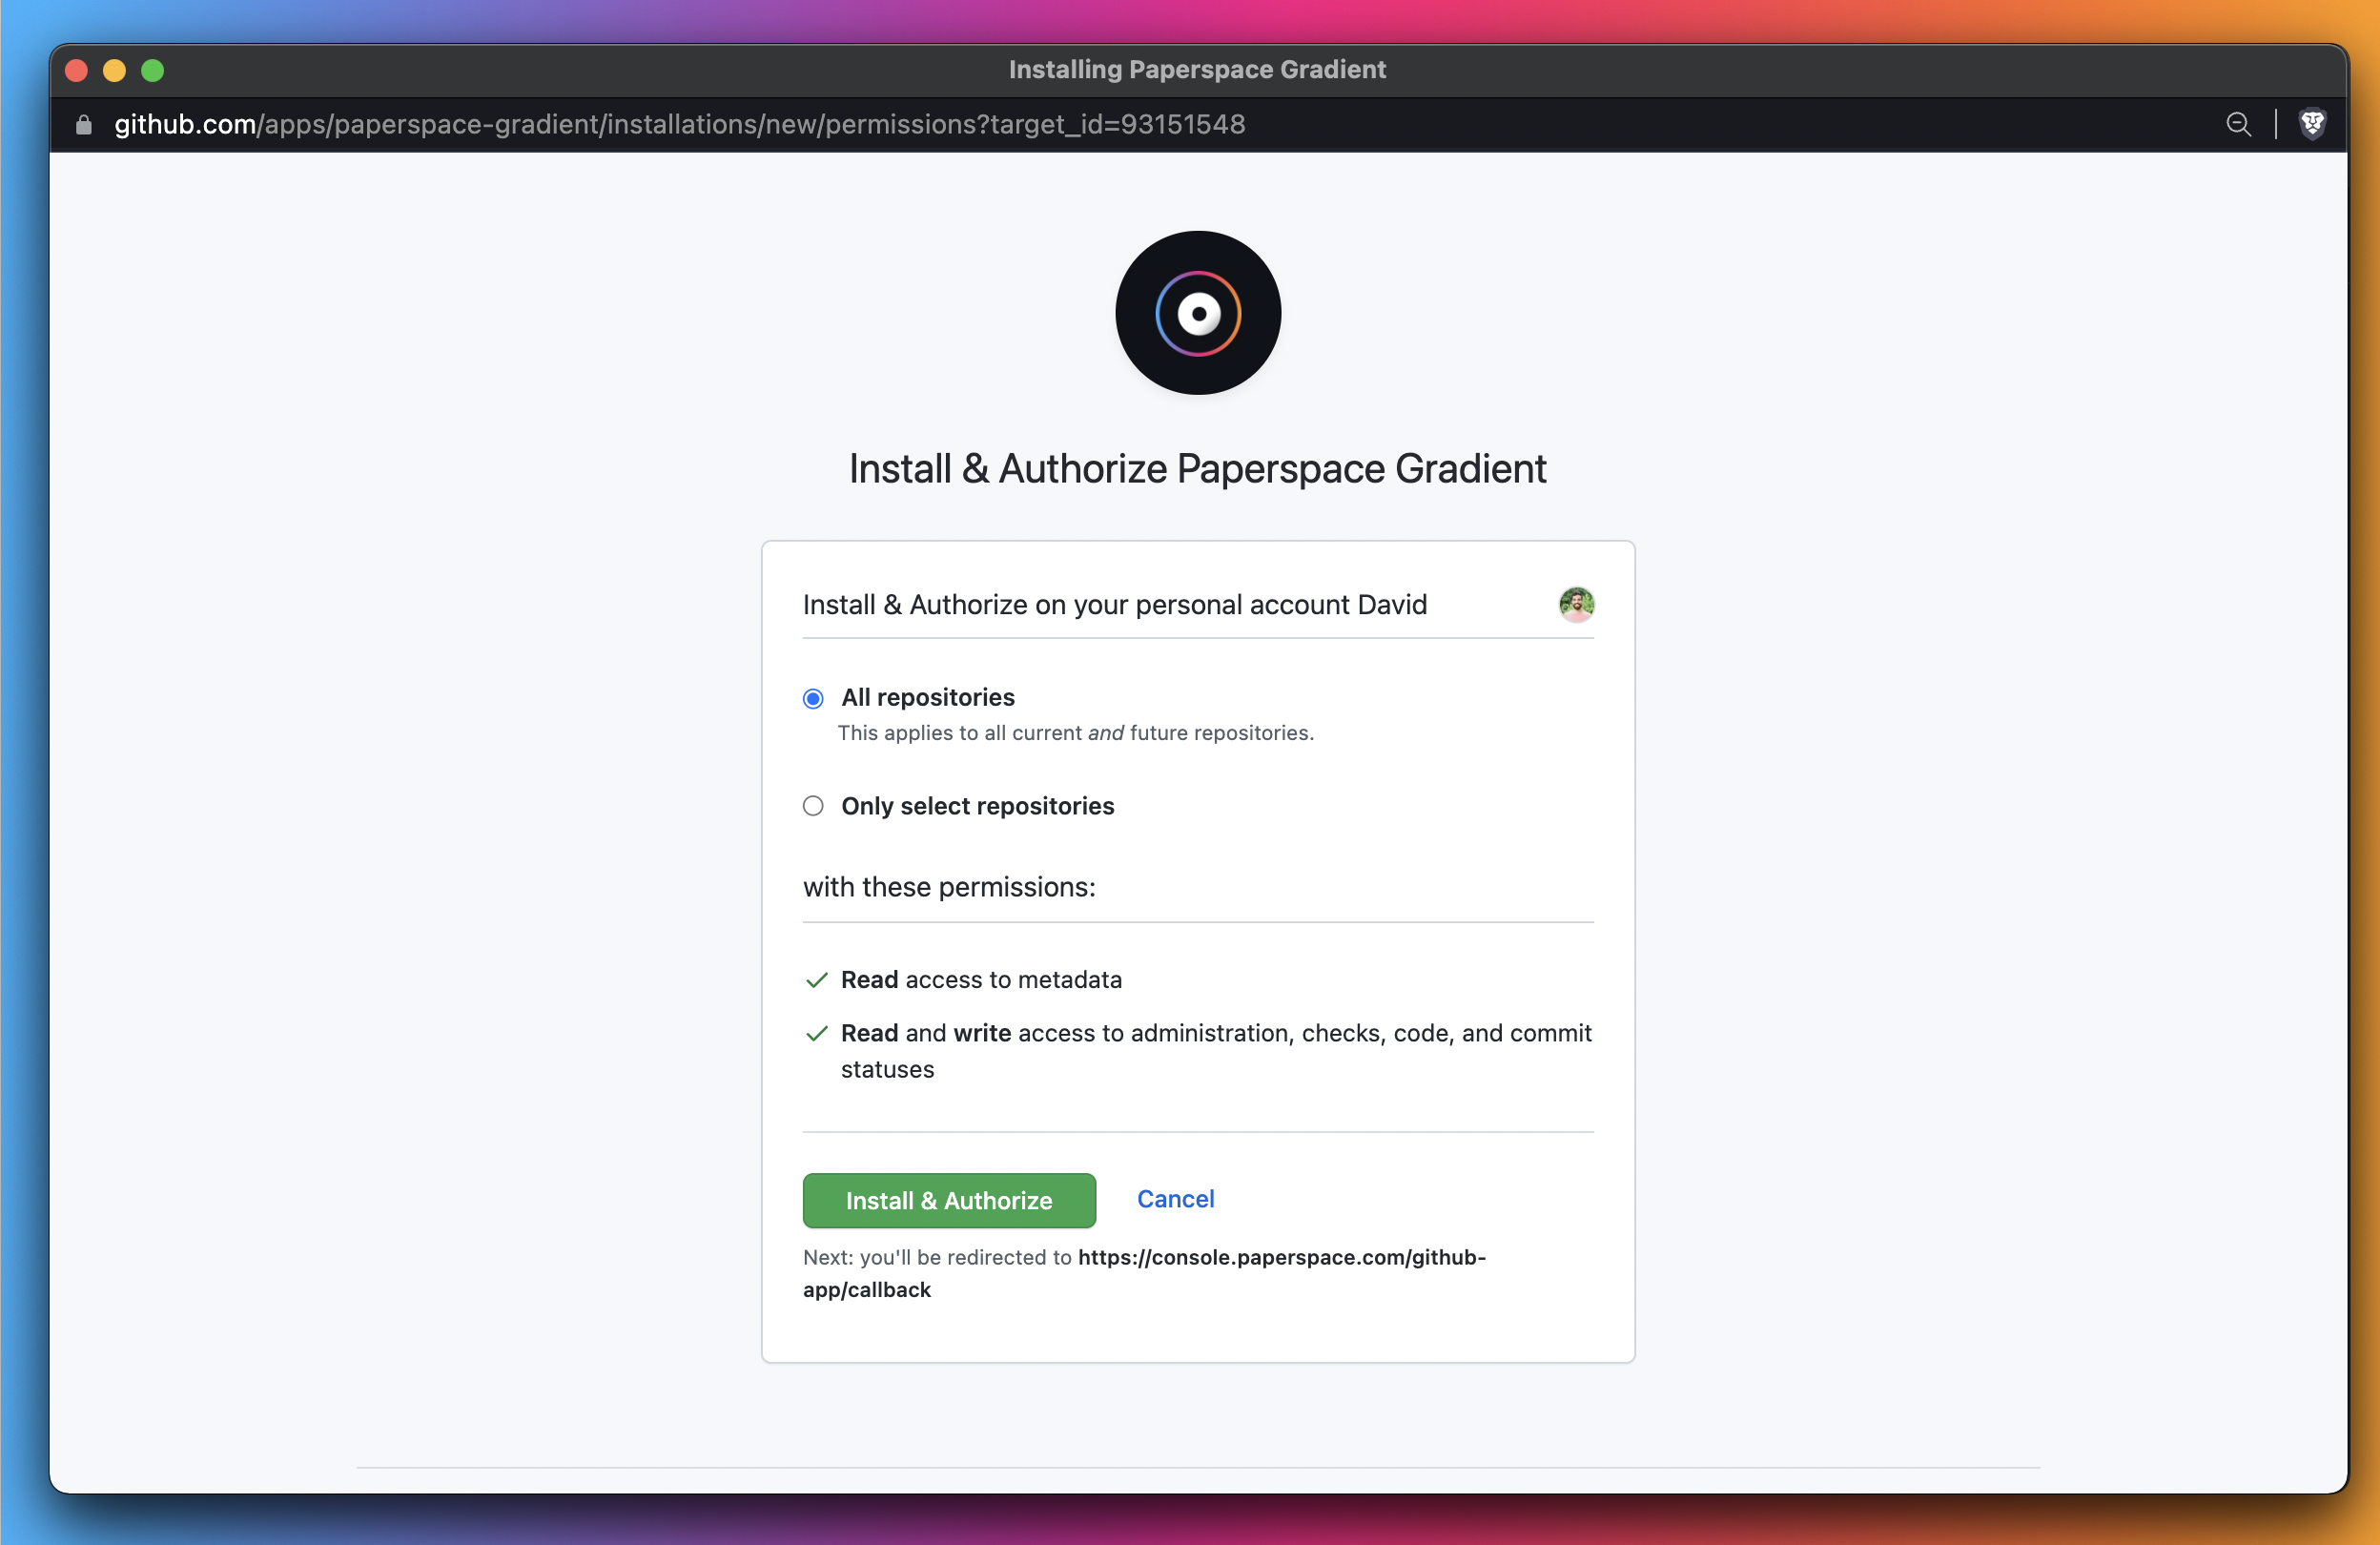
You need to give Gradient access to at least one GitHub repository during this step. This is because Gradient Workflows is designed to keep code version-controlled during the application development process. Part 1 of this tutorial writes the Gradient Workflow to a new repository in GitHub automatically.
In Part 2, you can use the GitHub integration to trigger workflow runs. This is a powerful MLOps capability that you can explore when you push code from your local machine to your remote GitHub repository.
Let’s go ahead and make the GitHub connection. When you connect GitHub, you unlock the Workflows UI which allows you to proceed.
When prompted, grant access to one or more GitHub repos.
Once you connect GitHub, unlock the Get started with workflows page.
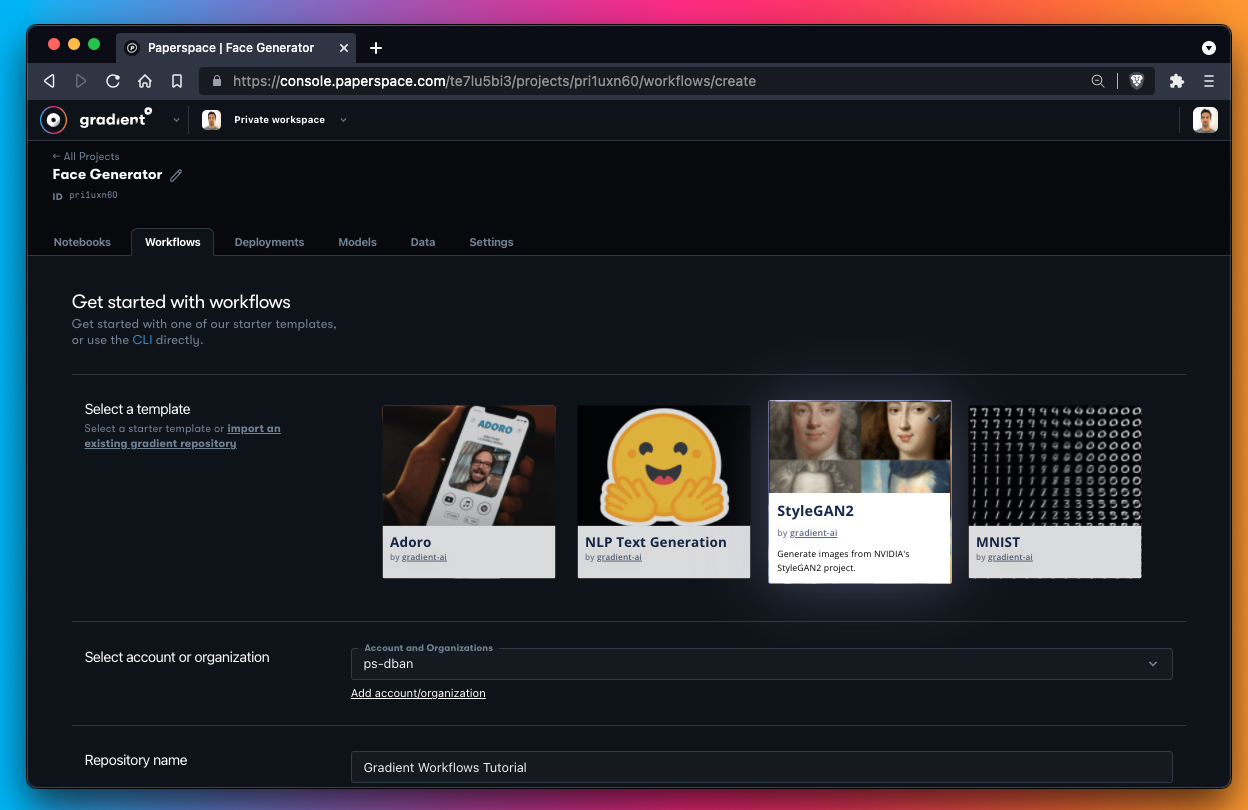
You now have the option to run either a sample workflow or to set up your own custom workflow.
You can make a custom workflow later in this tutorial, but for now, select the StyleGAN2 template tile.
Then select your GitHub account under Select account or organization.
Give your workflow a Repository name for writing to GitHub. In your case, name your repository “Gradient Workflows Tutorial.”
Click the Create Workflow button to begin the creation process.
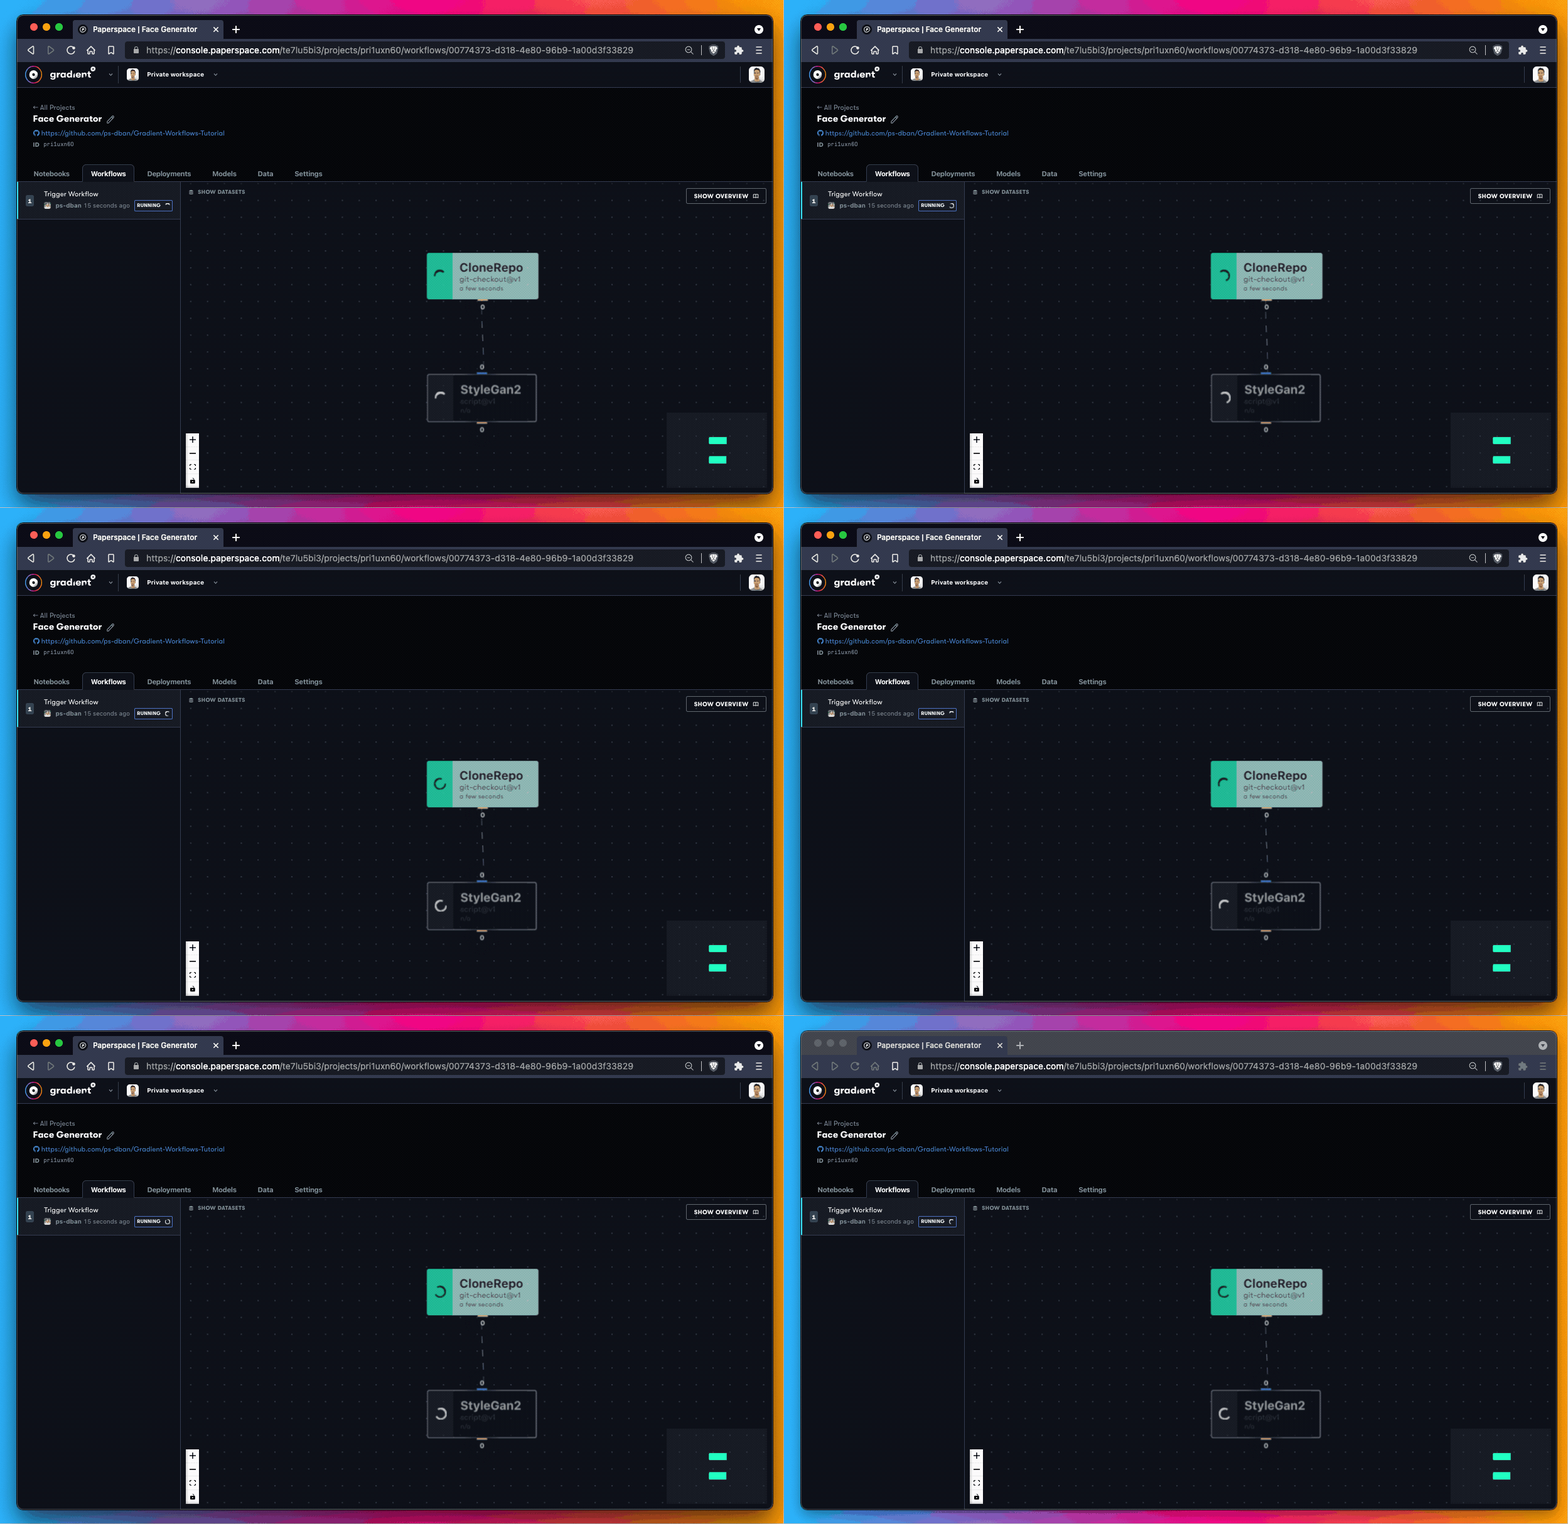
As the sample workflow initializes, notice that the workflow consists of QTY 2 jobs:
CloneRepoStyleGan2Each job represents a discrete action or step in the workflow syntax. In the UI, each job is represented by a light green box. You can reveal more information about the job – including logs, data, and so forth – by clicking it.
The workflow has completed successfully when the message reads Succeeded in the left sidebar. To confirm this, verify that the boxes containing each of your jobs (CloneRepo and StyleGan2) now display the checkmark symbol.
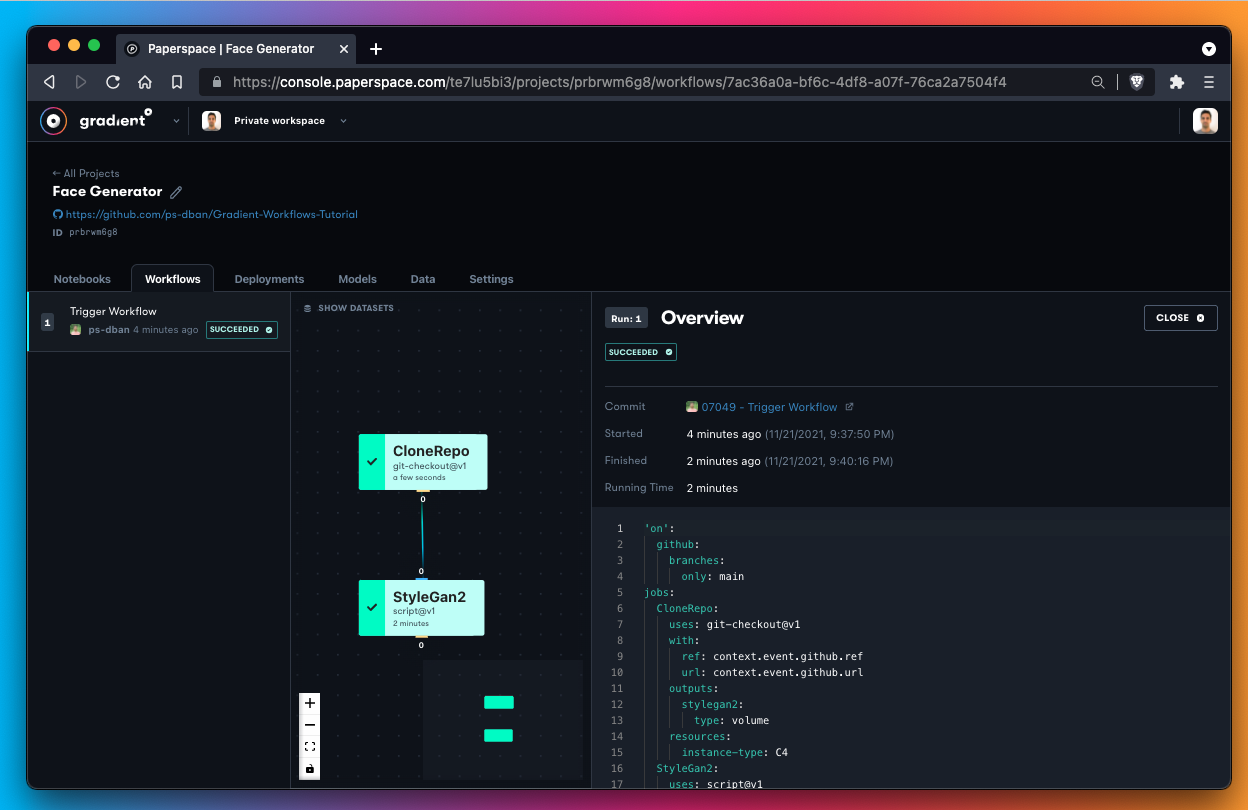
Each job within Gradient Workflows has its own set of logs. To reach the logs, click into each of the green boxes and tab over to the Logs section.
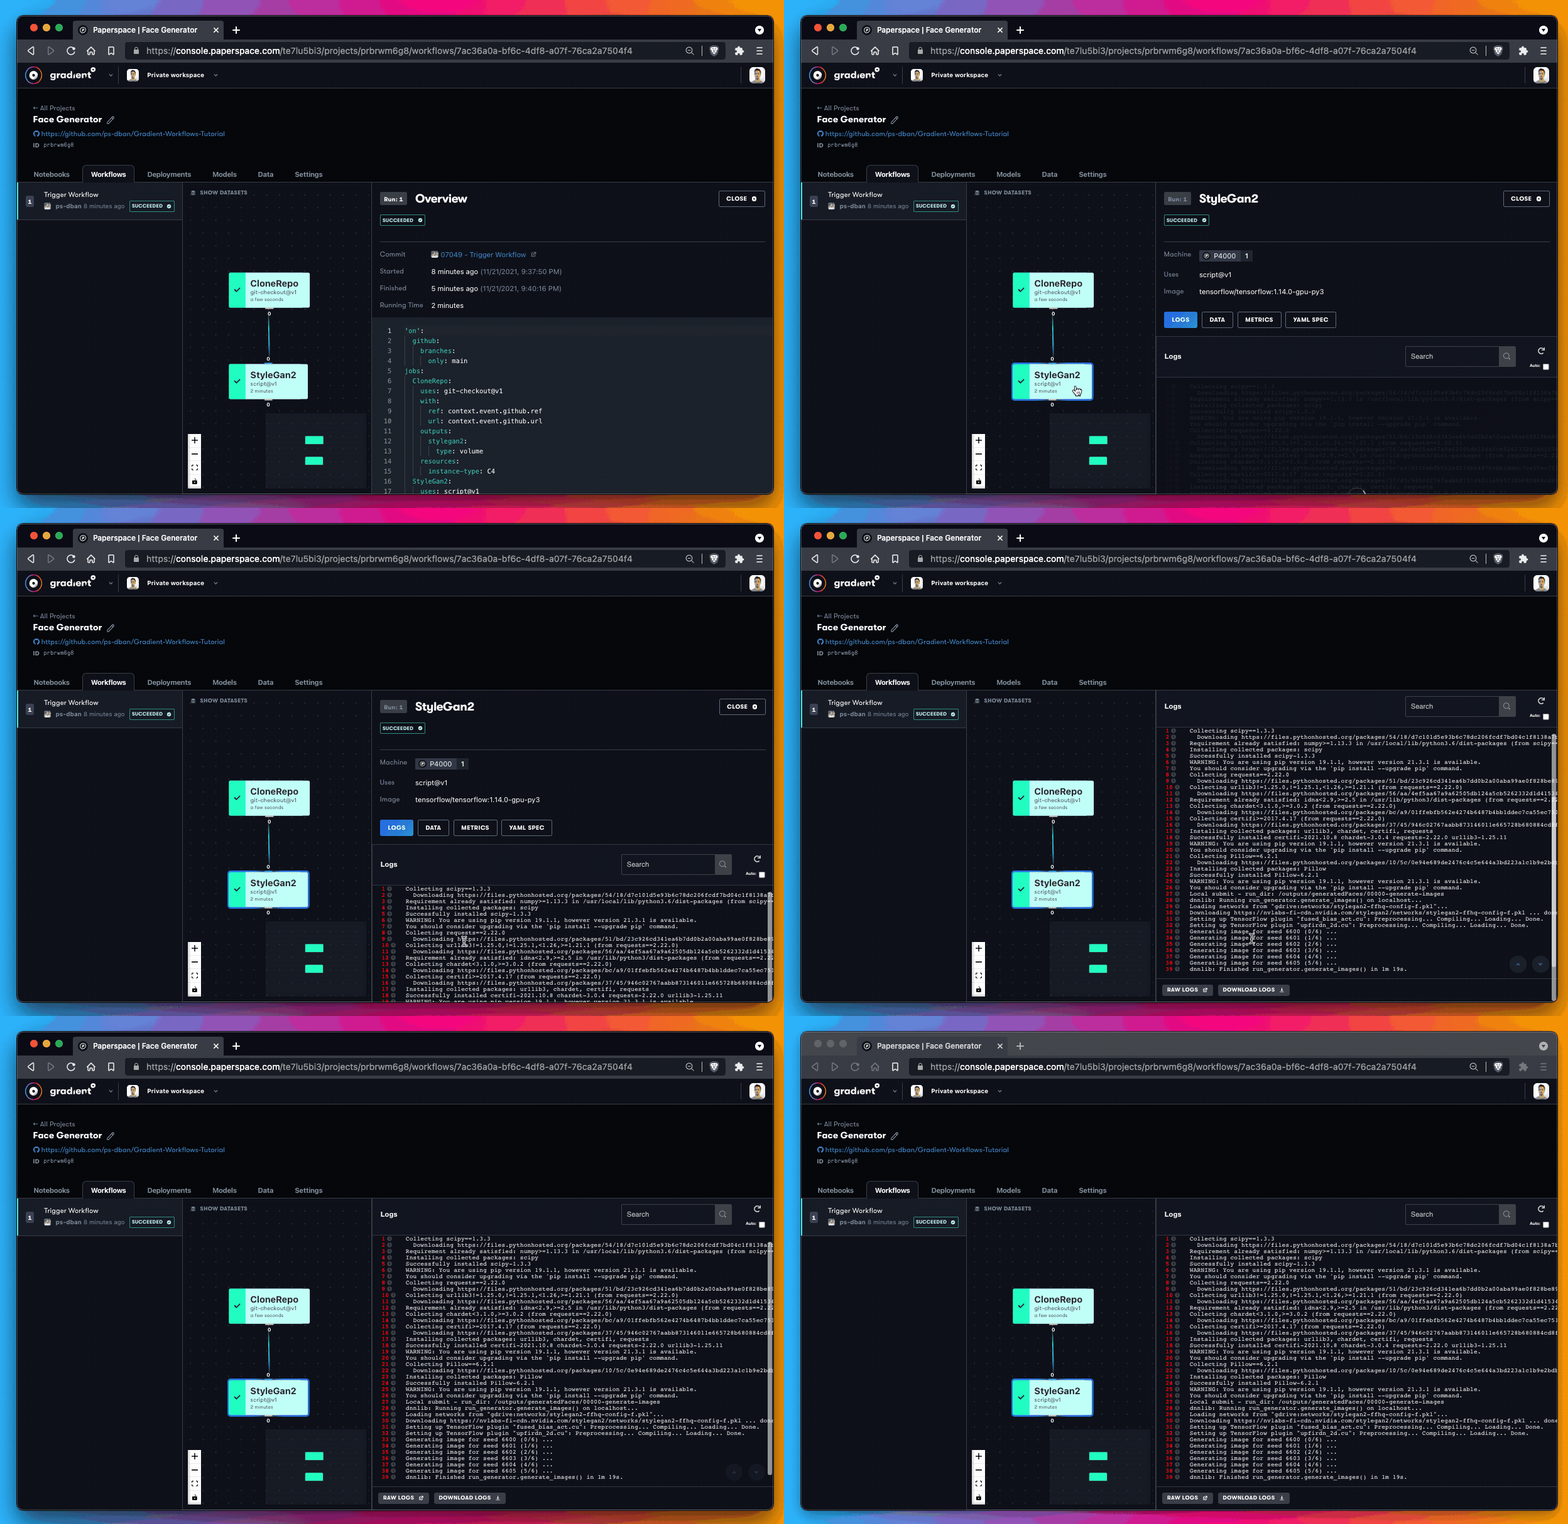
It is extremely useful for debugging to have discrete logs for each step of a workflow. This level of granularity means that you can isolate errors to a single job. Since ML pipelines have historically been difficult to debug, logging each step of a workflow independently is helpful.
If you examine the logs of the second job, StyleGan2, you should see something like this:
Generating image for seed 6600 (0/6) ...
Generating image for seed 6601 (1/6) ...
Generating image for seed 6602 (2/6) ...
Generating image for seed 6603 (3/6) ...
Generating image for seed 6604 (4/6) ...
Generating image for seed 6605 (5/6) ...
dnnlib: Finished run_generator.generate_images() in 1m 19s.
It appears that your face generator has succeeded in generating an image.
Leave the Logs tab for the moment and view the Data tab within the StyleGAN2 job. Here, find the seed images that you generated.
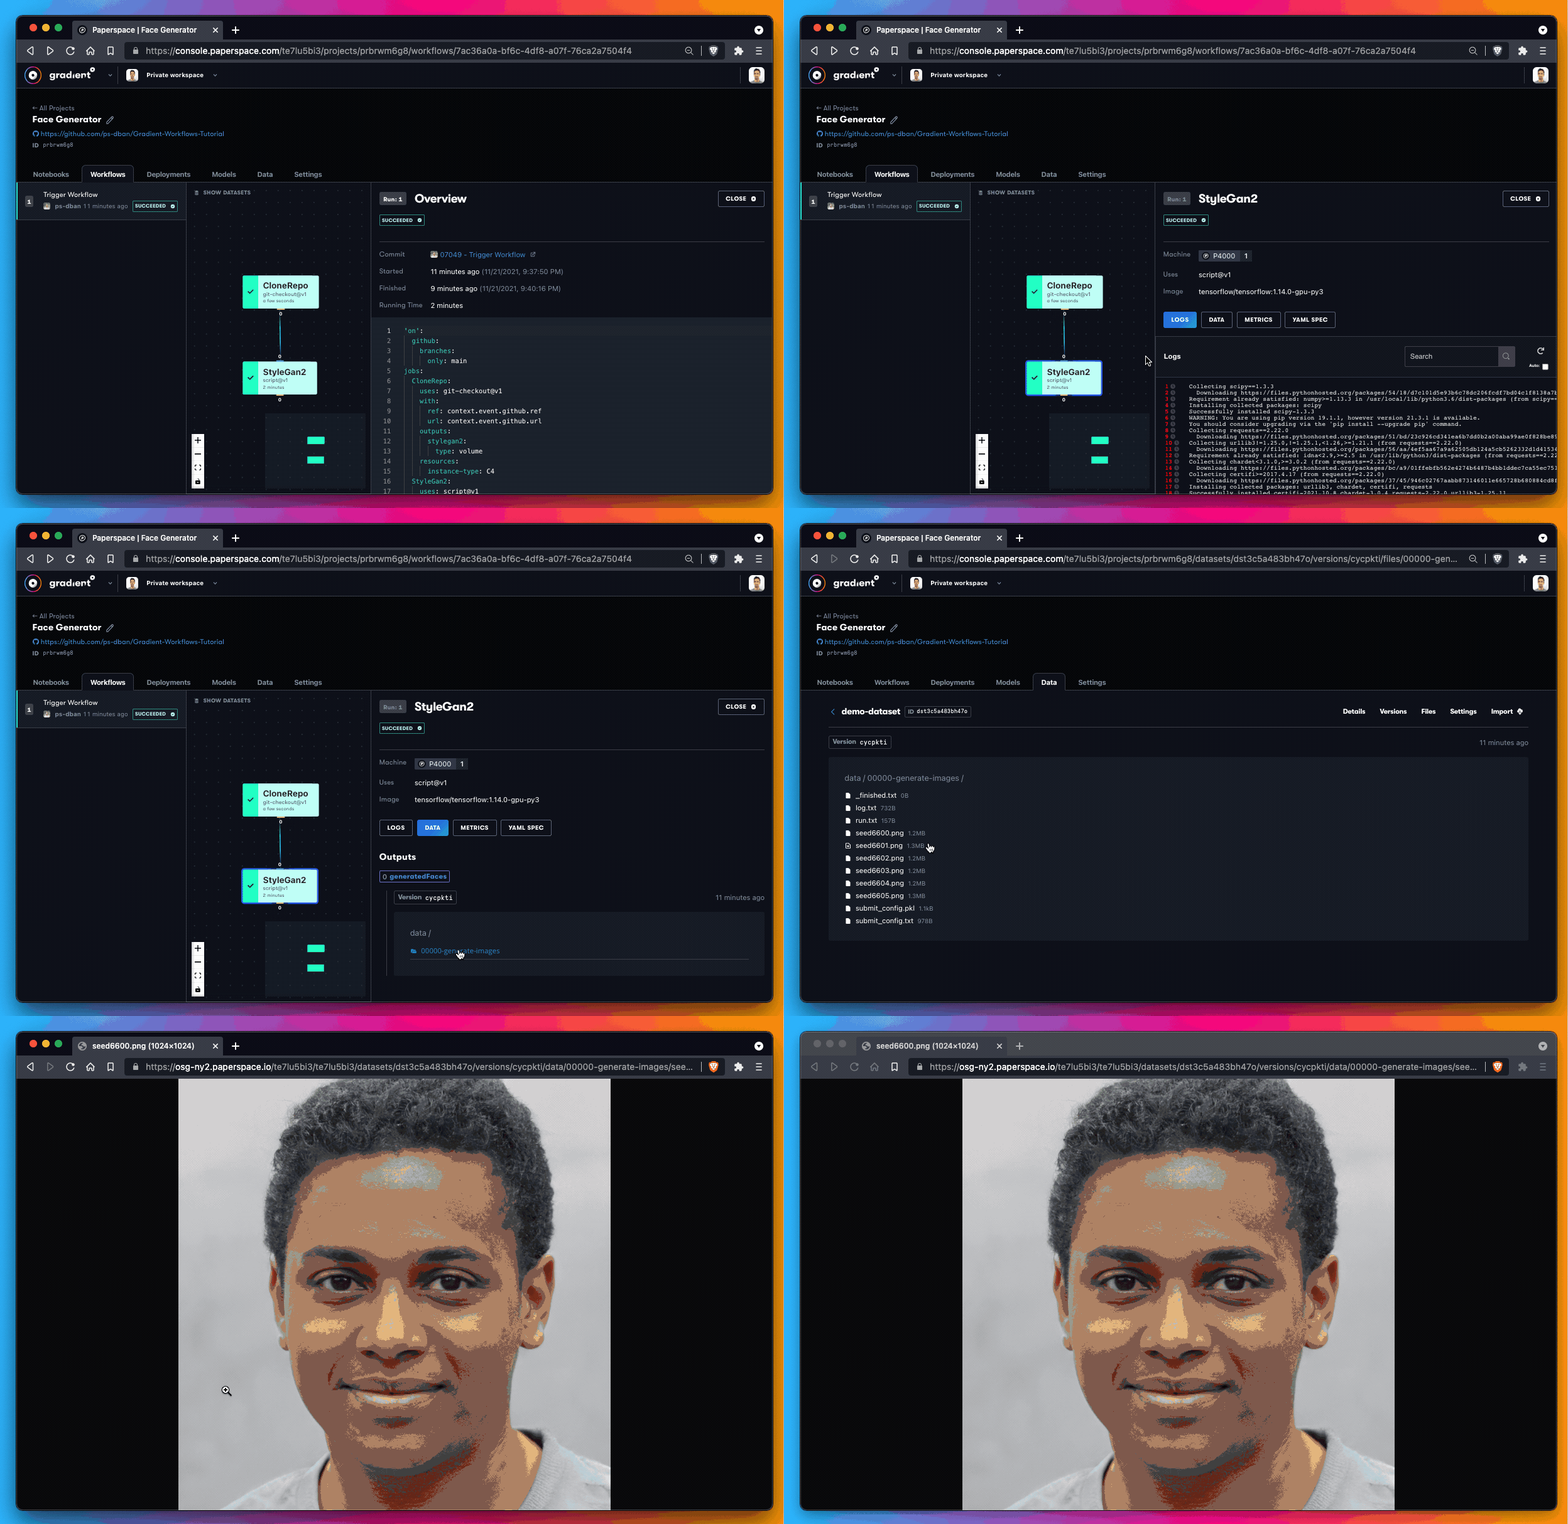
You should find the seed image named seed6600.png should look exactly like the image above.
Here are a few more images that you were able to generate in a short amount of time. Each of these faces does not exist in real life – you used Gradient Workflows to perform some generative image modeling to create them.

Now that you have successfully run your first workflow, check in on the GitHub repository that you created when you kicked off this workflow.
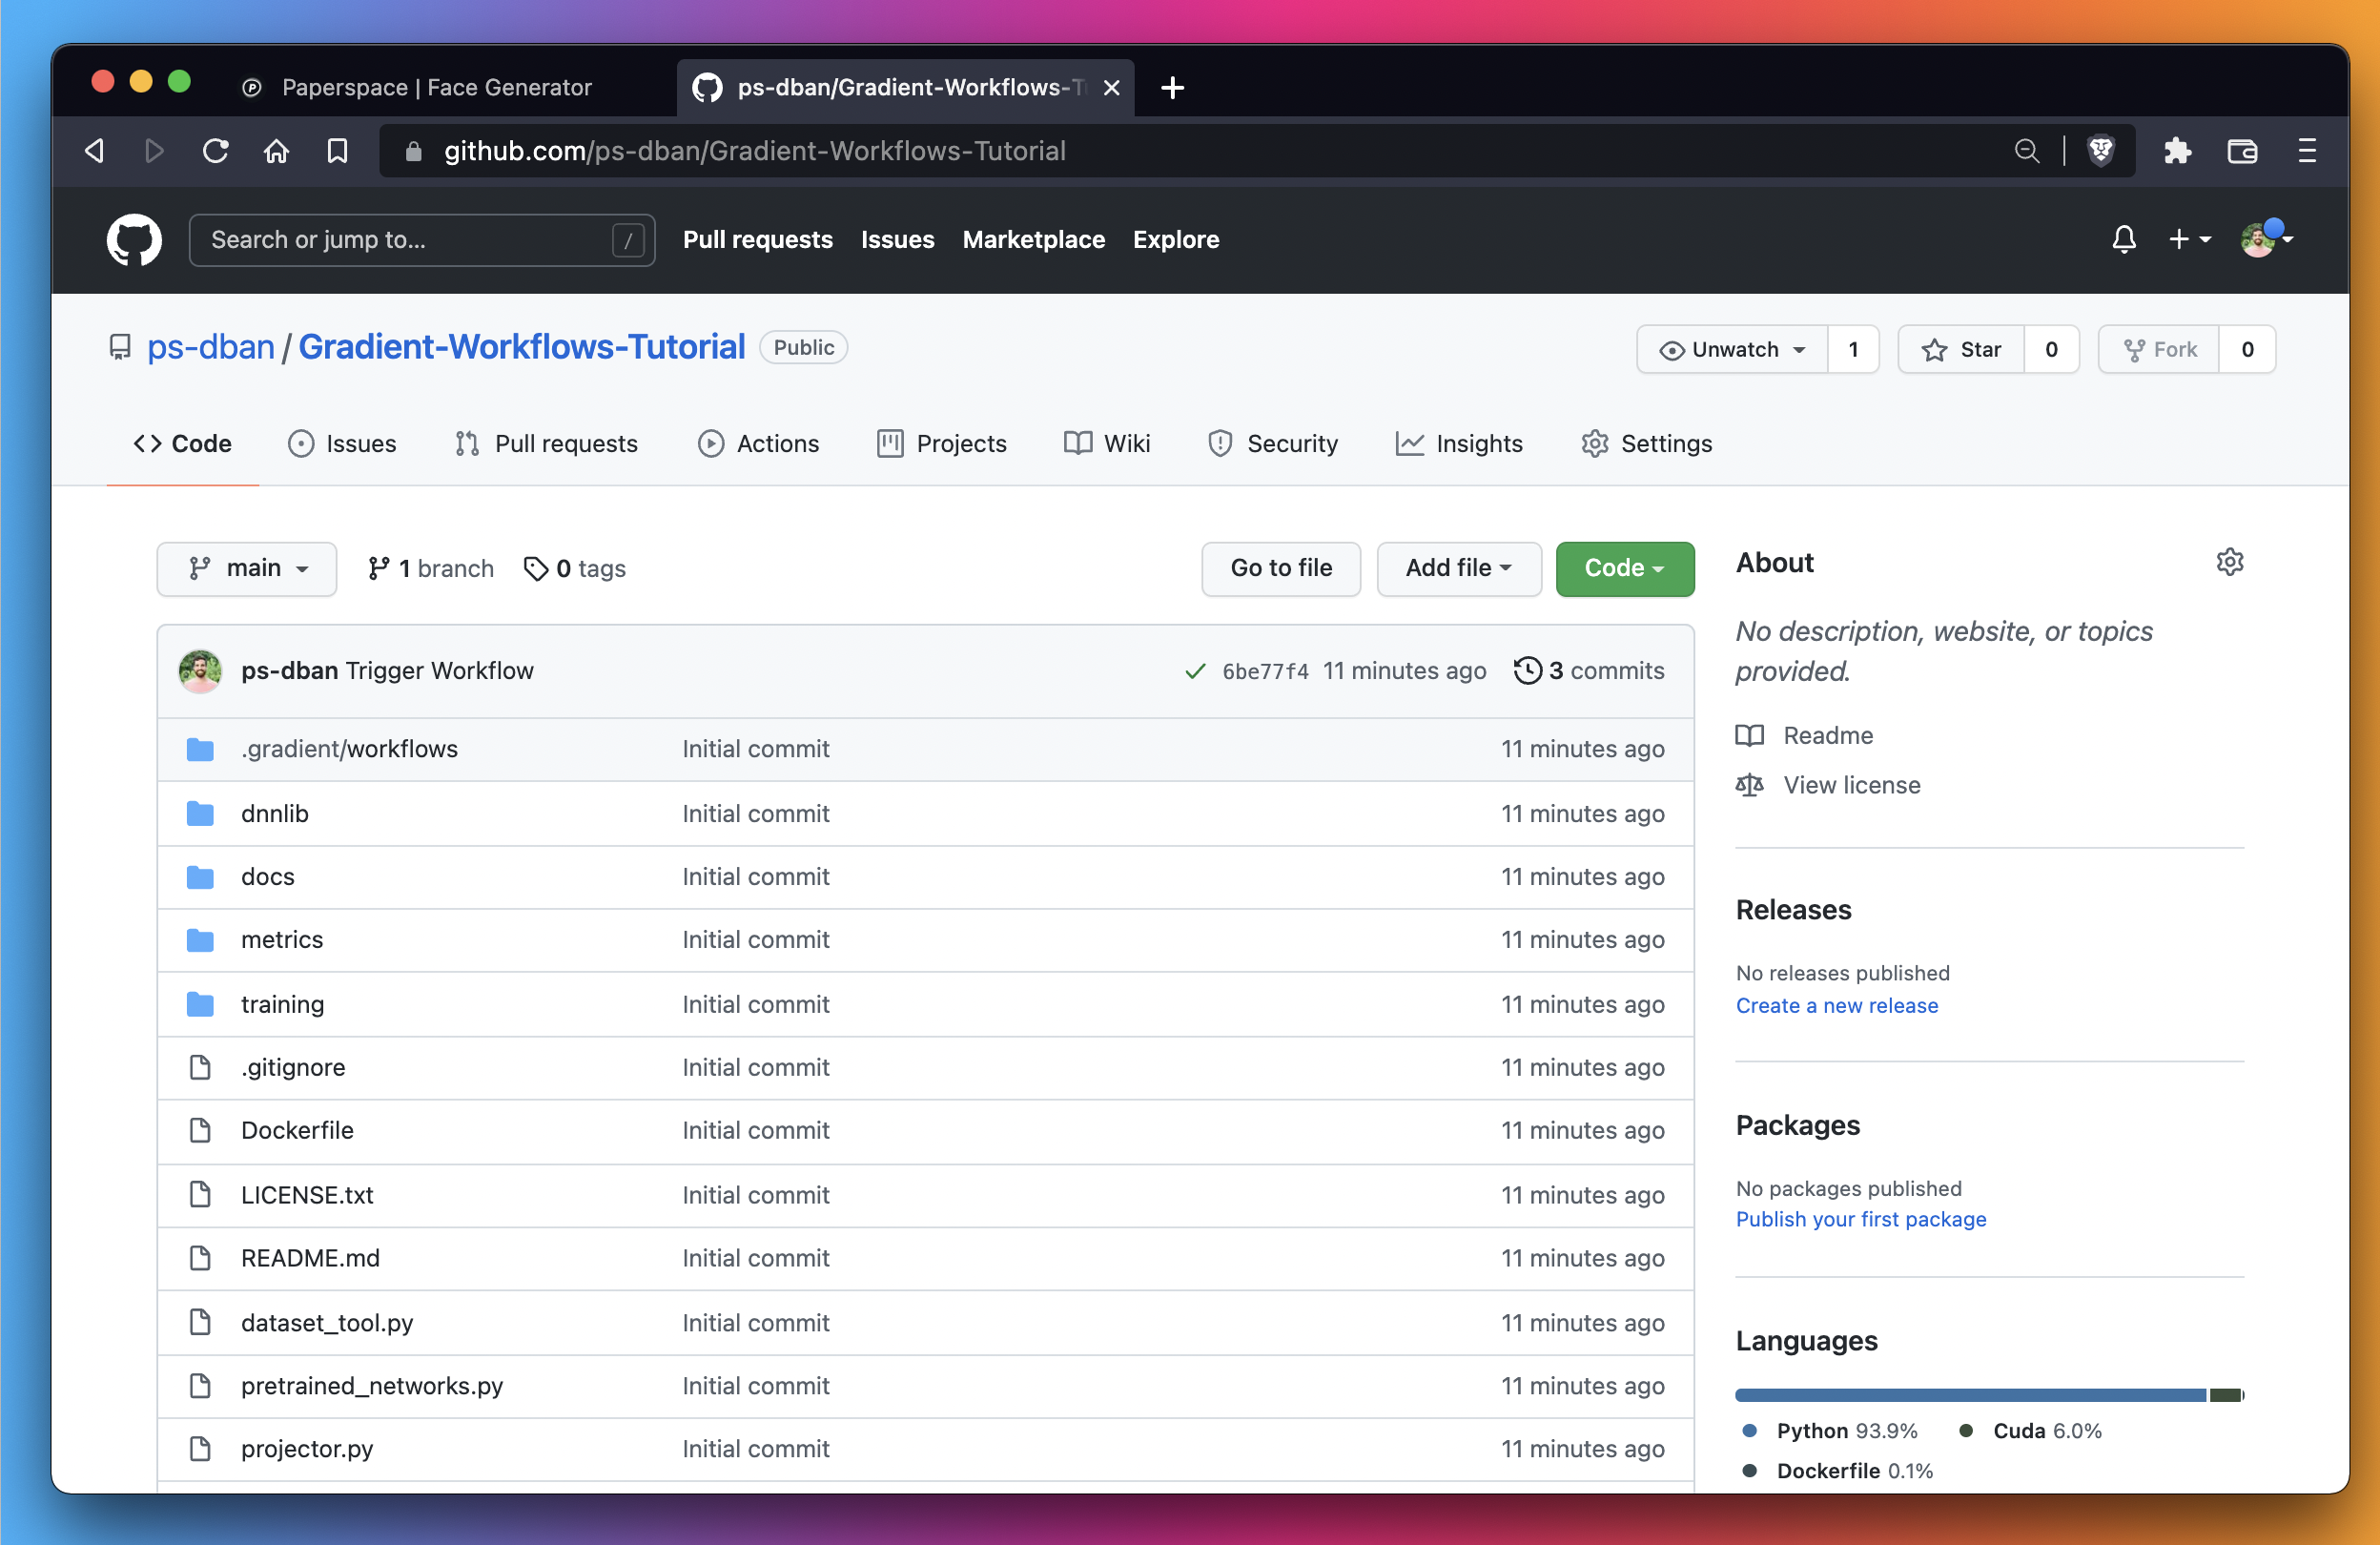
Your entire Workflow is visible in GitHub.
At this point, you have done the following:
Up next, you can customize the workflow to support a more complex use case. This involves creating QTY 7 jobs and producing more interesting results – this time by generating images of cats instead of images of people!
Now that you’ve successfully generated your first StyleGAN2 workflow, we’re going to create a more advanced implementation that increases the complexity of the workflow.
This involves running QTY 3 jobs to start while demonstrating how to use the GitHub integration to trigger workflow runs. You can also scale-up the workflow to QTY 5 jobs.
This time, modify the YAML file that was created automatically in Part 1. To verify the existence of the YAML file, visit the repository you created in Part 1 and navigate to the file located at Gradient-Workflows-Tutorial/.gradient/workflows/stylegan2.yaml.
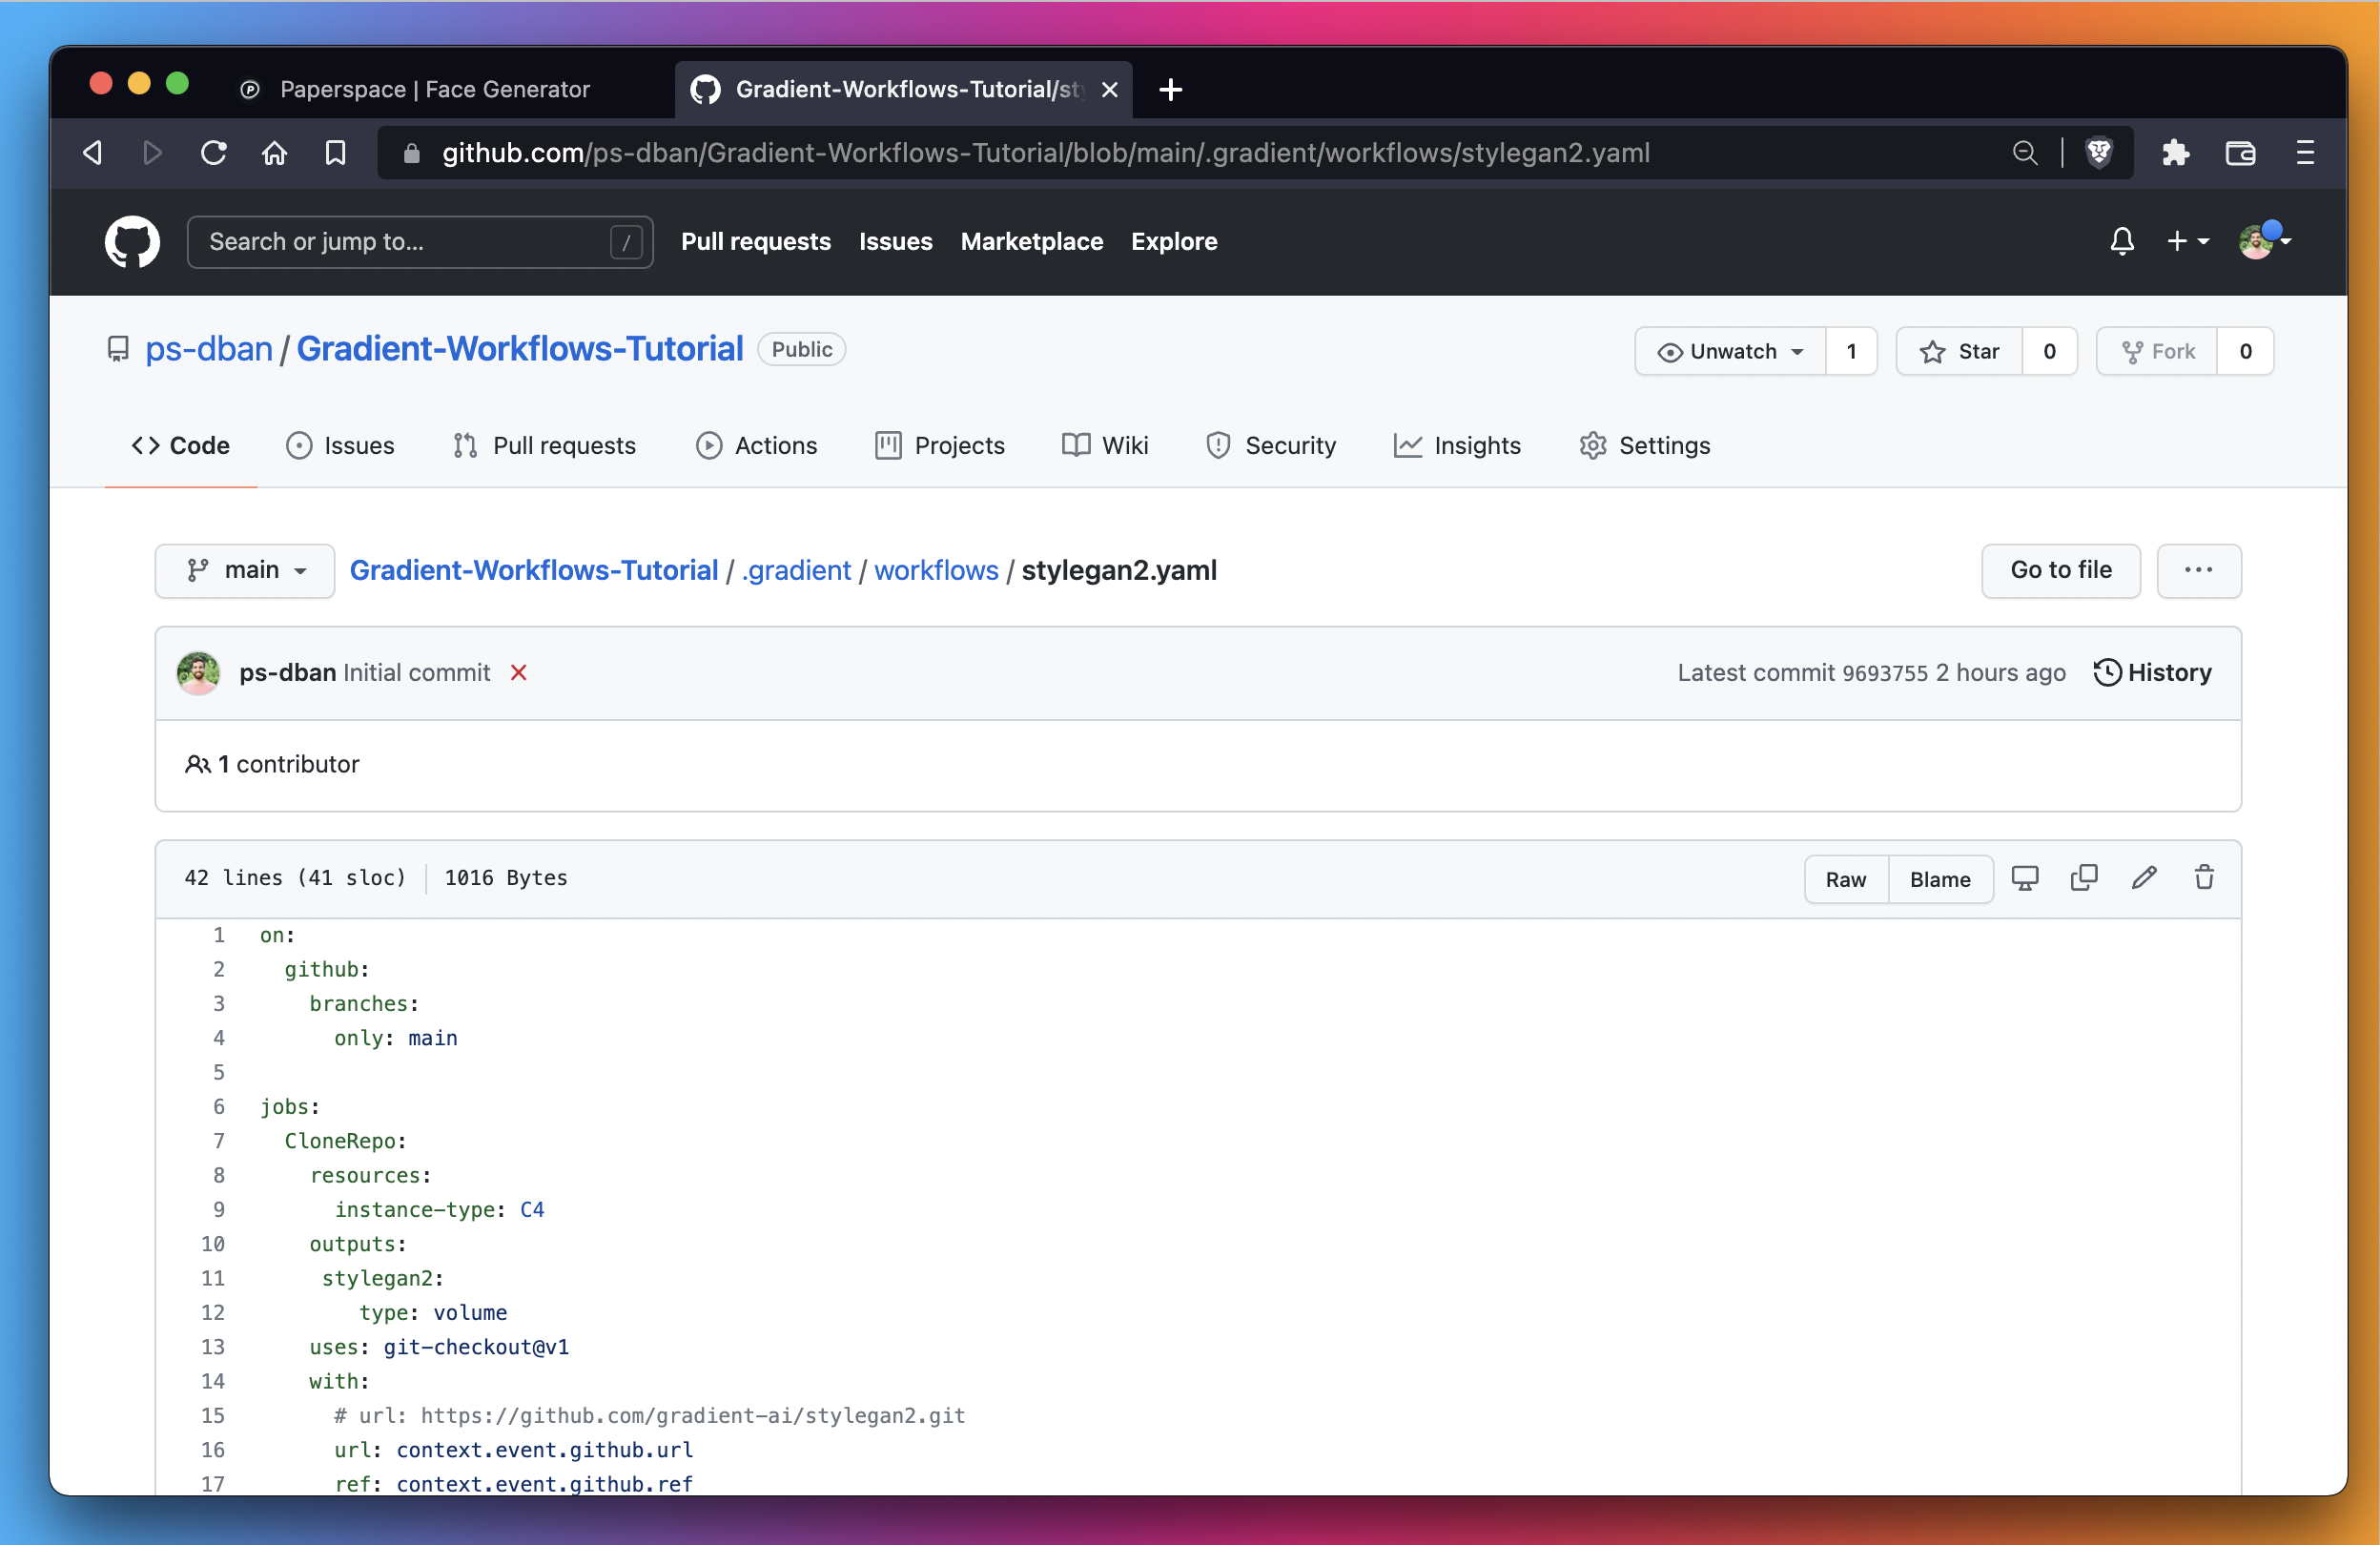
This YAML file contains instructions for each workflow job in a format that Gradient Workflows can understand.
This involves the following steps:
Clone the repo that you created in Part 1 onto your local machine. While it’s certainly possible to modify code files directly in the GitHub user interface, this tutorial works with files locally and then pushes them to source control.
This tutorial named the Workflow Gradient-Workflows-Tutorial previously, so the git clone command looks like the following. Yours differs be different depending on the GitHub account you connected to Gradient and the name you gave to your first Workflow.
Our particular command looks like this:
git clone https://github.com/ps-dban/Gradient-Workflows-Tutorial.git
However, yours may look like this:
git clone https://github.com/{your-github-handle}/{your-workflow-name}.git
Clone the repo locally. For more detailed steps, we recommend checking out GitHub’s cloning documentation.
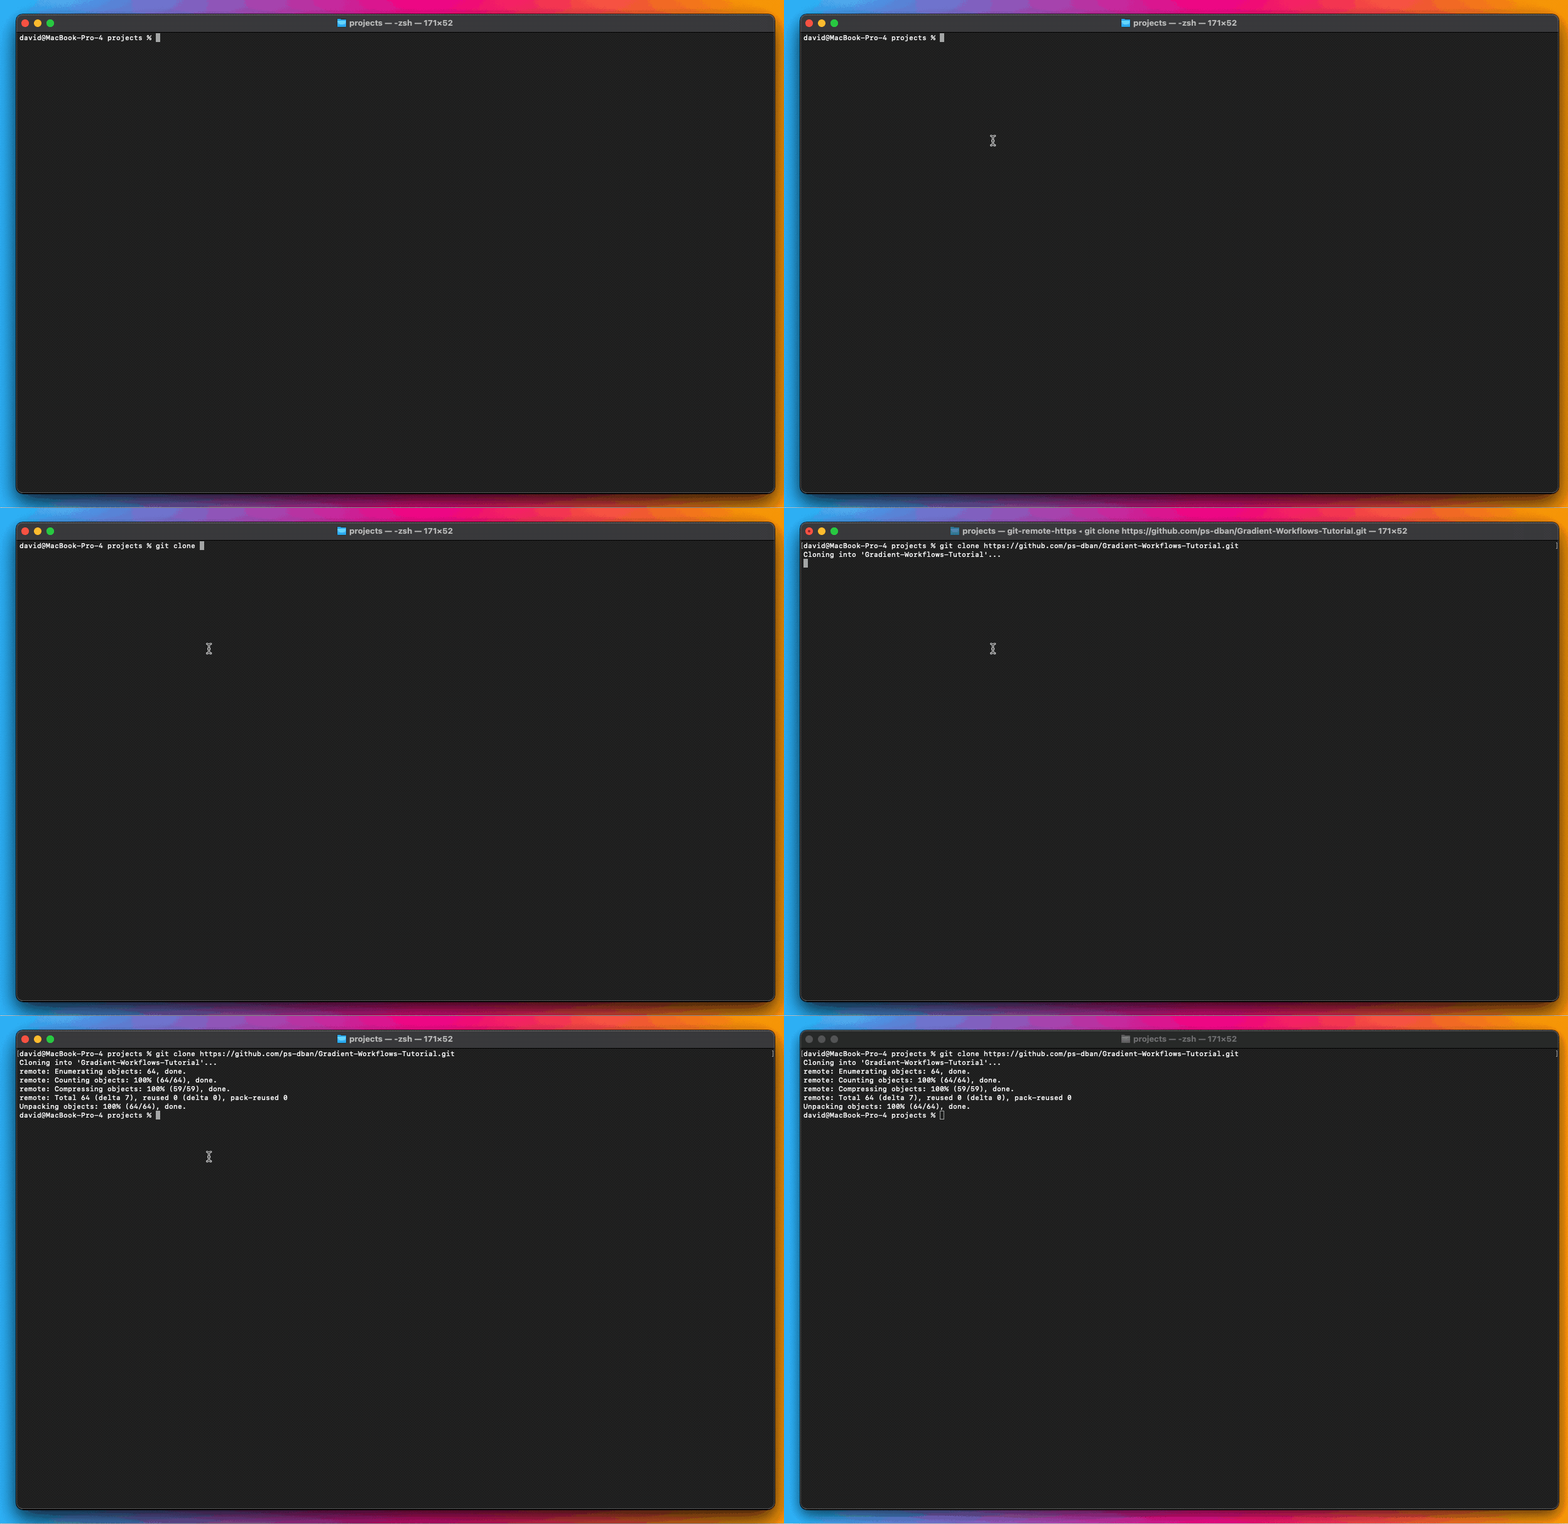
After you clone the repo locally, cd into the local directory and ls to reveal a directory structure like this:
Dockerfile		docs			run_metrics.py
LICENSE.txt		metrics			run_projector.py
README.md		pretrained_networks.py	run_training.py
dataset_tool.py		projector.py		test_nvcc.cu
dnnlib			run_generator.py	training
This directory contains a number of files that you created during Part 1 of the tutorial.
The ls -a command reveals a number of hidden directories including .git, .gitignore, and .gradient directories.
Your YAML file is located within the .gradient directory and you can cd into it and ls to confirm that it contains a workflows directory that contains your YAML file.
Now that you know you have the right files, open the repo in whatever local IDE you prefer.
This tutorial uses VSCode.
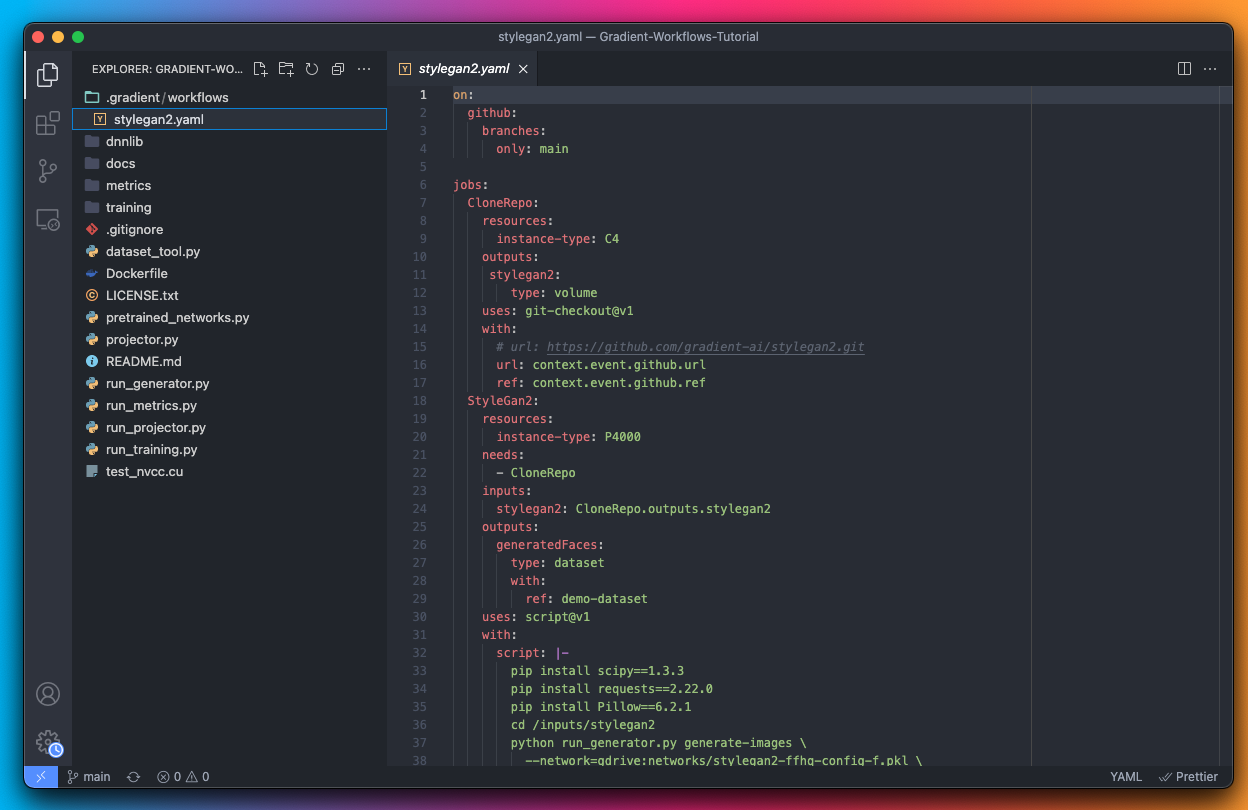
The file that you’re looking at in this image is the YAML file responsible for orchestrating the workflow you ran in Part 1. The file is in the directory .gradient/workflows within the repo.
If you inspect the file, there are QTY 2 jobs specified in this YAML file. One is called CloneRepo and the other is called StyleGAN2. These are the same jobs from Part 1.
Next, modify this YAML file to add a number of steps to your workflow. Whenever you make a change to this repo and push it to the main branch, it triggers a new workflow run.
Next up, copy a new YAML over to your local repo and then push your repo to GitHub to trigger a new workflow run.
The new YAML file that you need to copy and paste into your workflow project is available at this URL:
https://raw.githubusercontent.com/gradient-ai/gradient-workflows-tutorial-files/main/stylegan2.yaml
Let’s go ahead and copy that text and paste it into the file on your local machine located at .gradient/workflows/stylegan2.yaml:
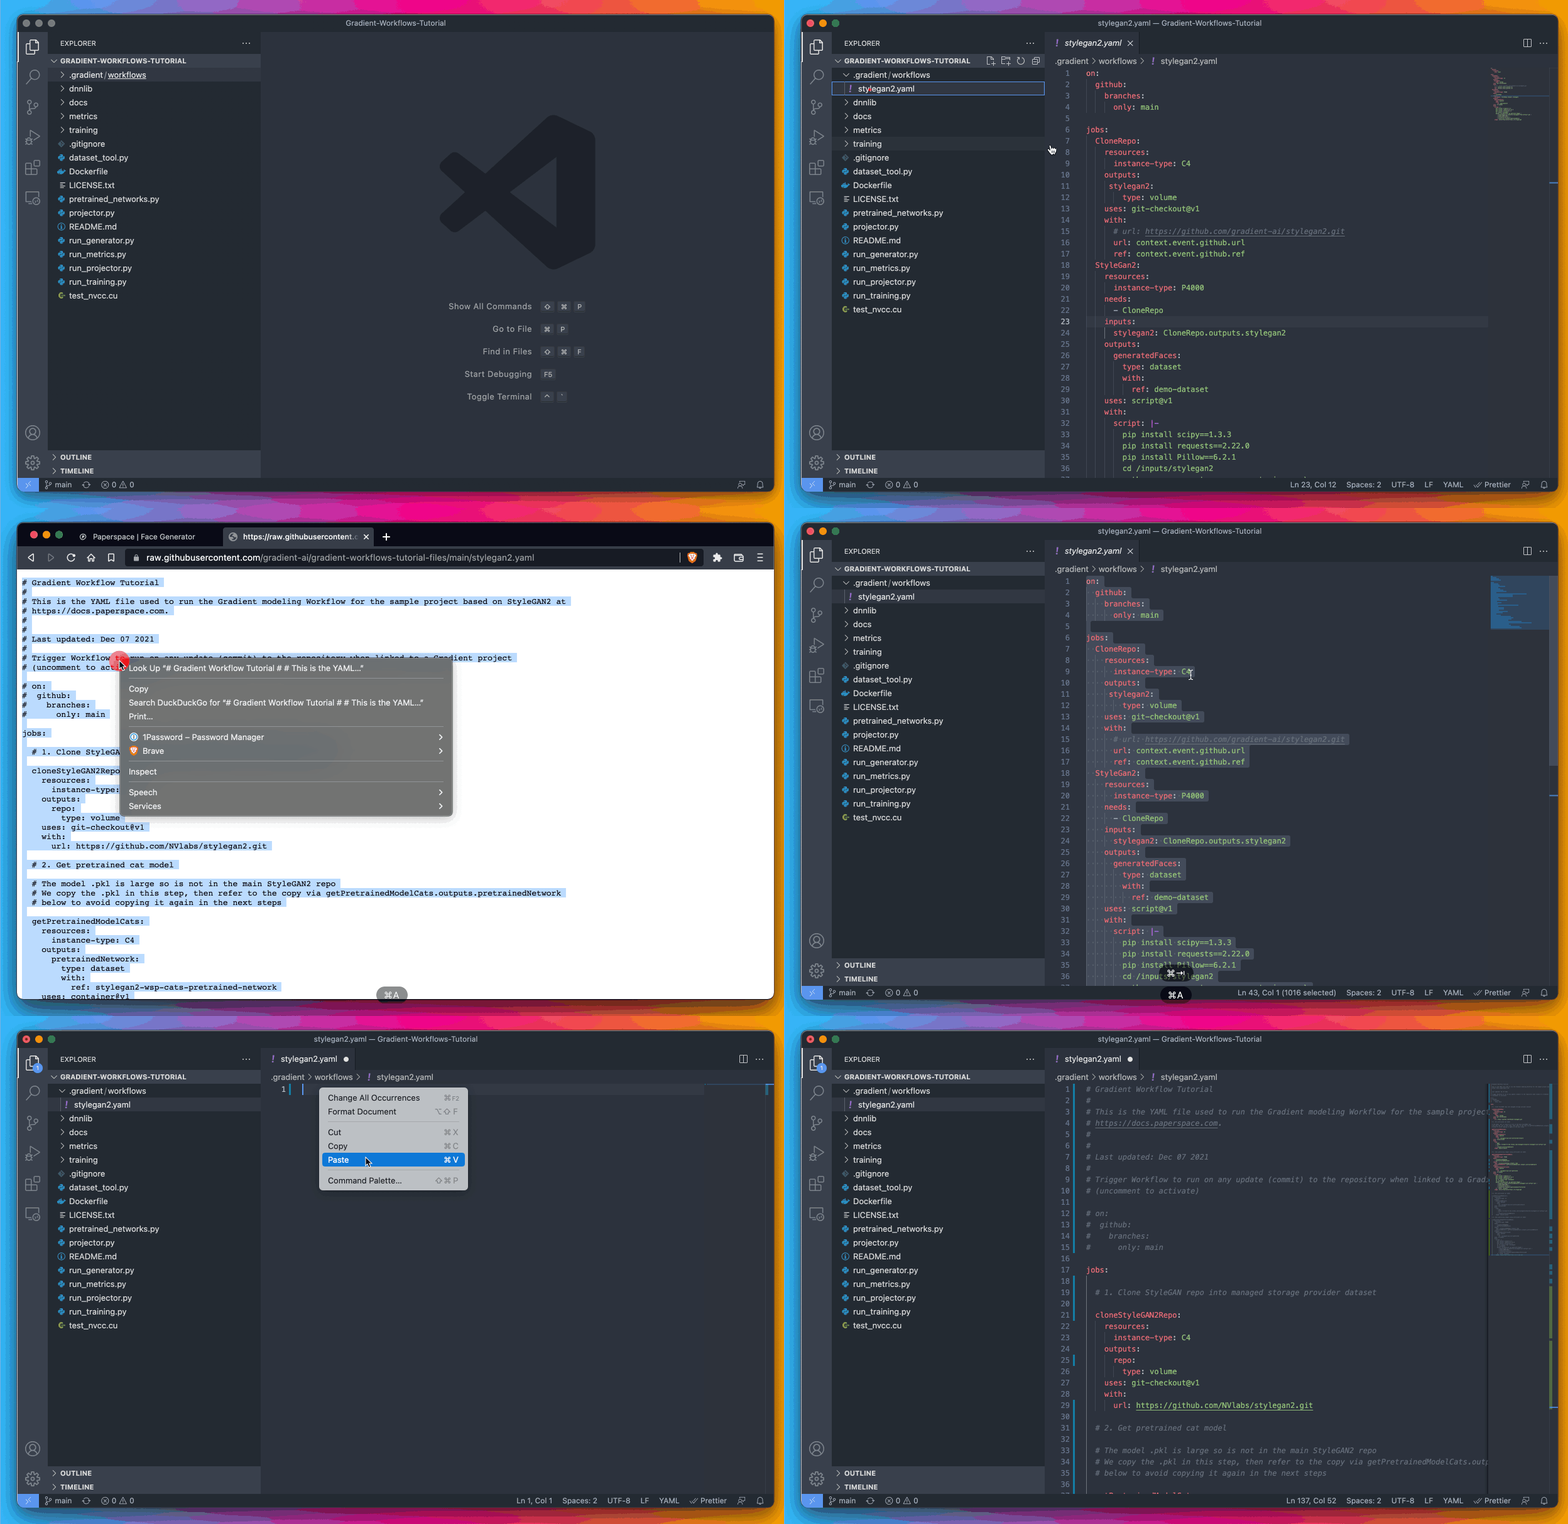
You have copied the contents of the YAML file linked above and pasted it in its entirety into the YAML file located at .gradient/workflows/stylegan2.yaml.
Before you push this modified YAML to GitHub, let’s quickly understand what it’s going to do.
The first thing you can see is that your on block is commented out. First, uncomment this block and push the file to GitHub:
#on:
#  github:
#    branches:
#      only: main
The rest of the file specifies QTY 5 distinct jobs. This is a substantial increase from the first tutorial, in which you created a total of QTY 2 jobs.
Each job is specified under the jobs heading in the file.
cloneStyleGAN2Repo - uses a C4 instance type (a basic CPU machine) to clone the StyleGAN2 source code from NVIDIA’s GitHub repo into a managed storage provider on GradientgetPretrainedModelCats - uses a C4 instance type to copy a pre-trained model of cats (a large .pkl file) over to GradientgenerateCatImagesPretrainedModel - uses a P4000 instance type to display images of cats generated using the pre-trained cats modelgetPretrainedModelCars - uses a C4 instance type to copy a pre-trained model of cars (a large .pkl file) over to Gradient - [Commented out to start]generateCarImagesPretrainedModel - uses a P4000 instance type to display images of cars generated using the pre-trained cars model - [Commented out to start]tOne of the best parts of Gradient Workflows is that you can schedule an arbitrary number of jobs on different compute instances. You are starting with jobs #4 and #5 commented out, so your first run only runs QTY 3 jobs and you can make additions from there.
You can run a job with no dependencies or external dependencies, or you can require that a job wait for a previous job to complete before running. Each job can consume different types of inputs, produce different types of outputs, and accept different arguments at runtime. Workflows even allows each job to load a distinct Docker image from a public or private repo.
Your next step is to push your local repo to the GitHub remote repository to kick off a new training run.
One of the things you may have noticed in the YAML file is the appearance of Gradient Datasets. Here’s an example from #2 Get pretrained cat model:
outputs:
      pretrainedNetwork:
        type: dataset
        with:
          ref: stylegan2-wsp-cats-pretrained-network
In this code block, Gradient is expecting to see a Gradient Dataset called stylegan2-wsp-cats-pretrained-network – so you have to create it.
Create QTY 4 datasets, which should only take a minute or two.
First, navigate over to the Data tab in Gradient. It should look like this:
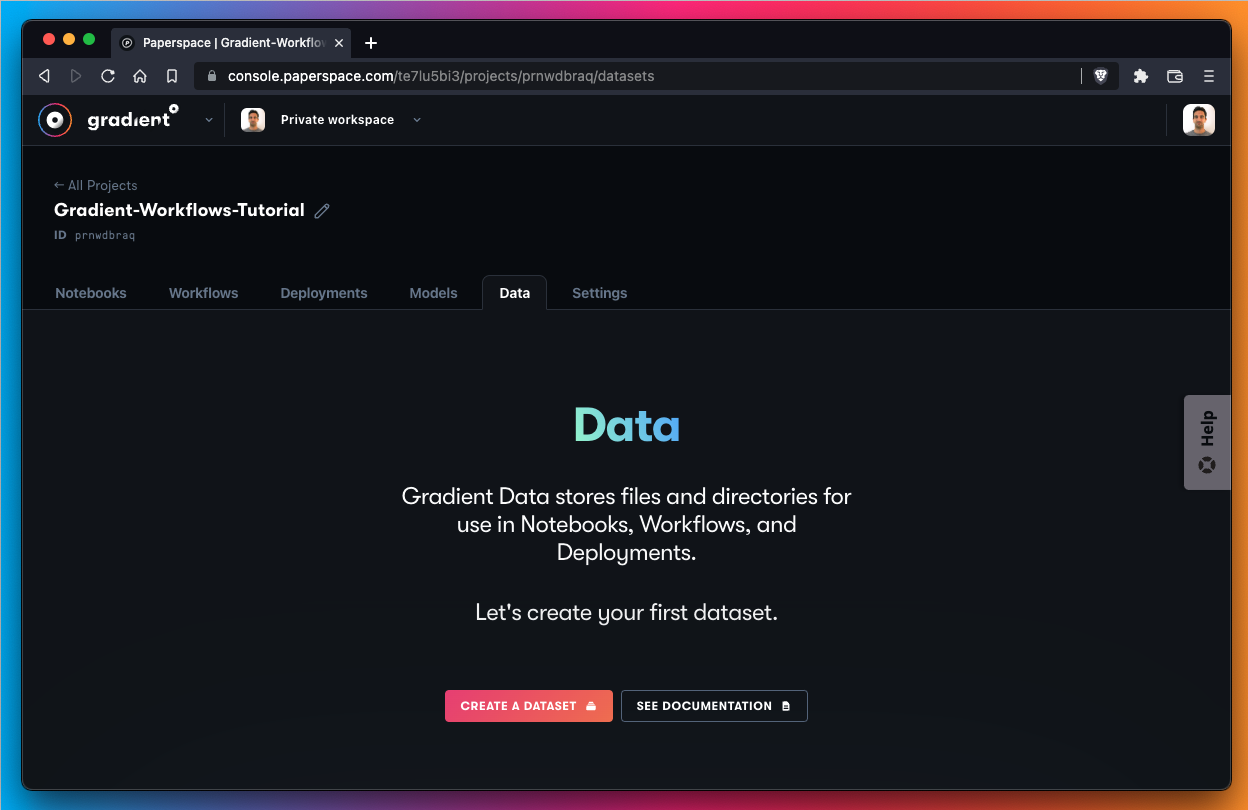
Next, create your new empty dataset. You need a total of QTY 4 empty datasets.
Those are as follows:
stylegan2-wsp-cats-pretrained-network
stylegan2-wsp-cats-generated
stylegan2-wsp-cars-pretrained-network
stylegan2-wsp-cars-generated
Create the empty dataset like so:
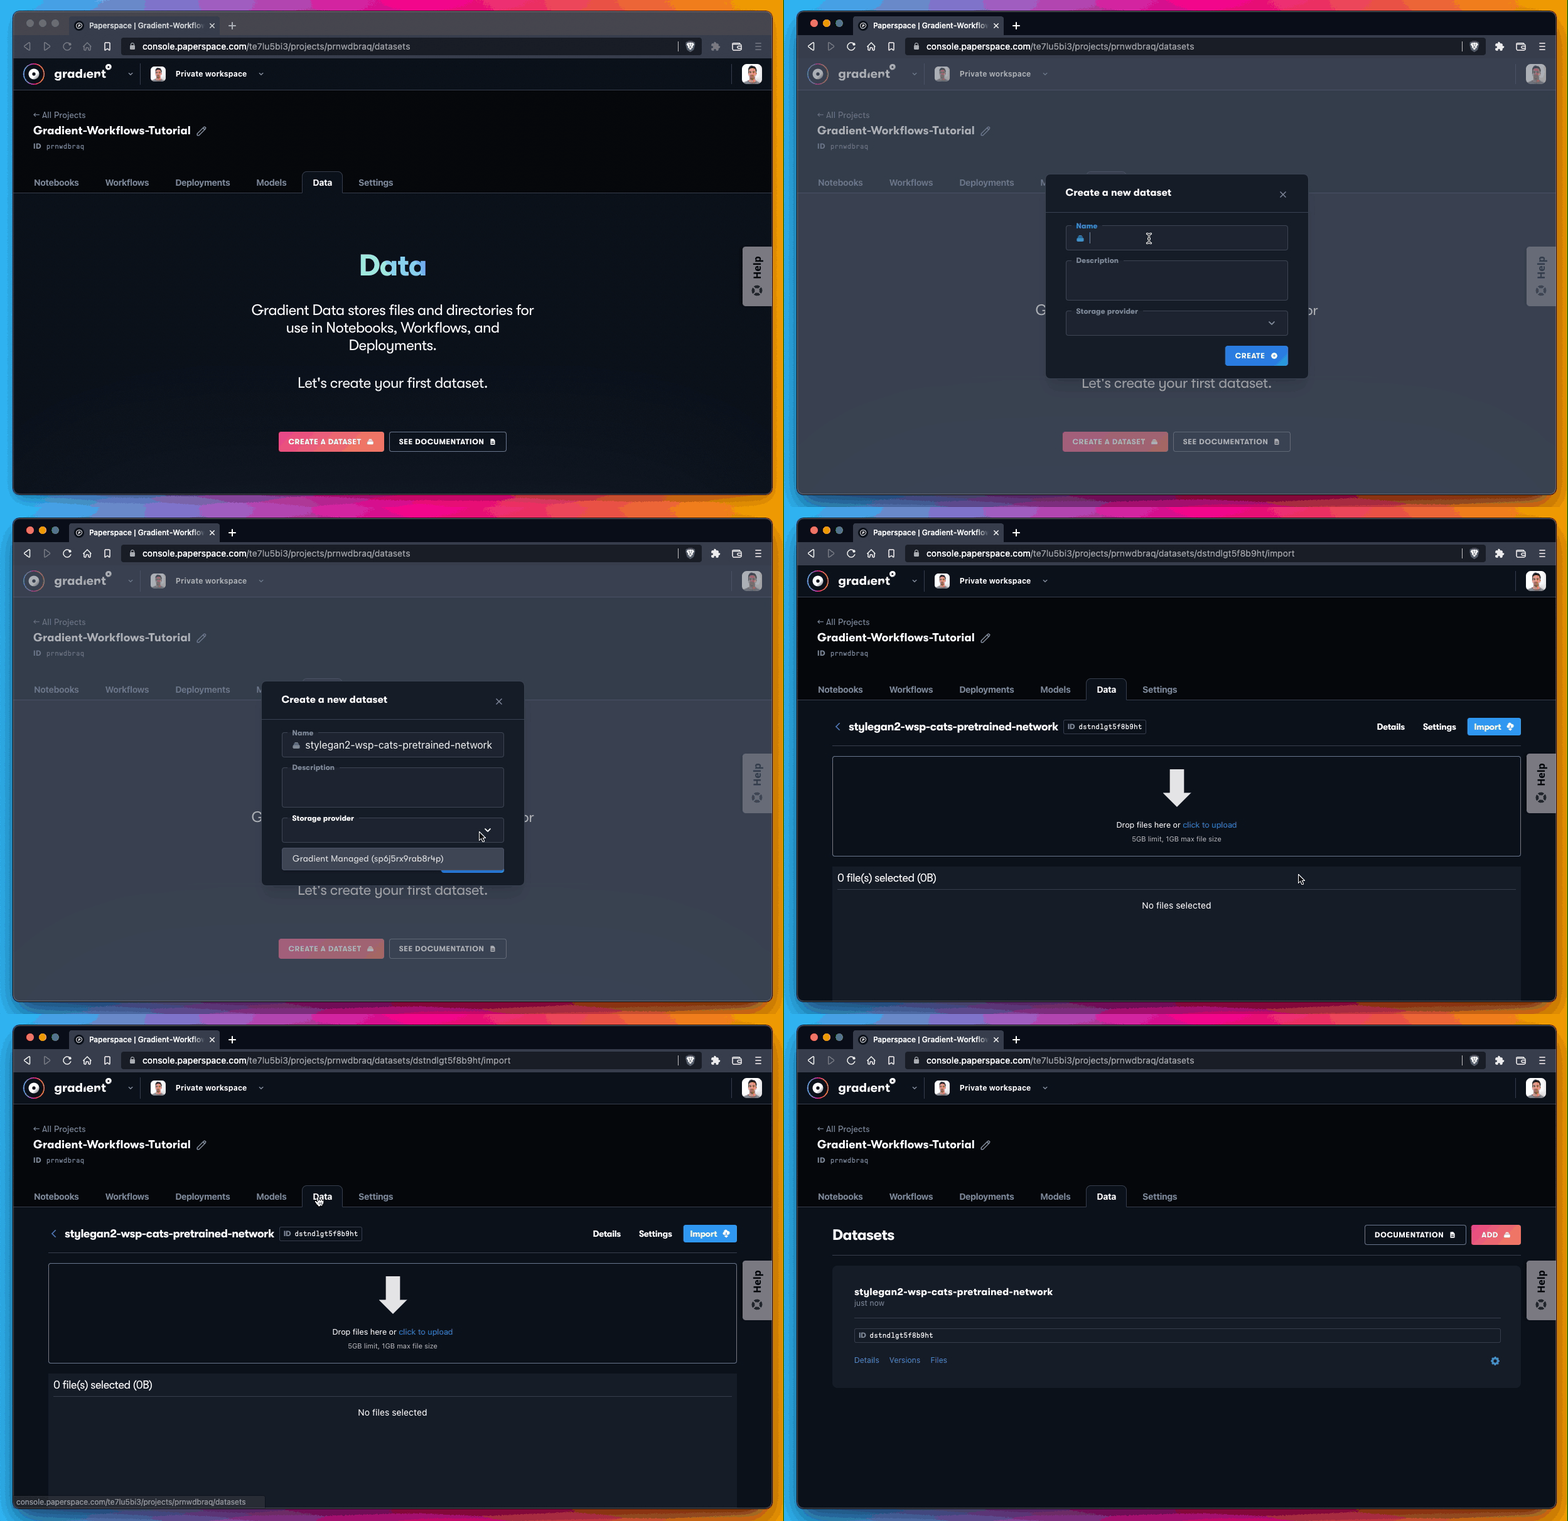
All you’re doing here is using each of the QTY 4 references listed above as the Name parameter when creating a new dataset.
For the Storage Provider parameter, you’re using Gradient Managed, which is the name of the default Gradient cluster.
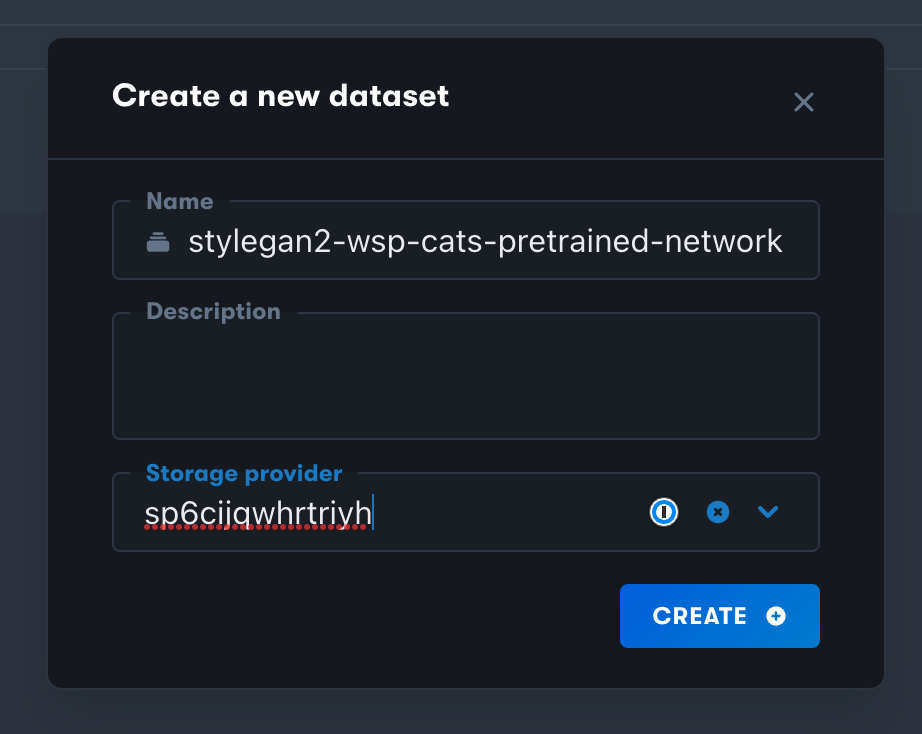
Once you have these empty datasets created, it’s time to start the workflow.
Let’s go ahead and run the Workflow now.
First, in your local text editor, uncomment the command at the top of the new YAML file. If you do not uncomment the on block, your workflow cannot run.
It should now look like this:
on:
 github:
   branches:
     only: main
Save your file and push your changes to your remote repository.
This tutorial uses the terminal to push the change using these commands; though, you can use any technique you like to push code to remote source control:
git add .
git commit -m "modify yaml file"
git push origin main
After you push to GitHub, confirm that your remote repo received the changes.
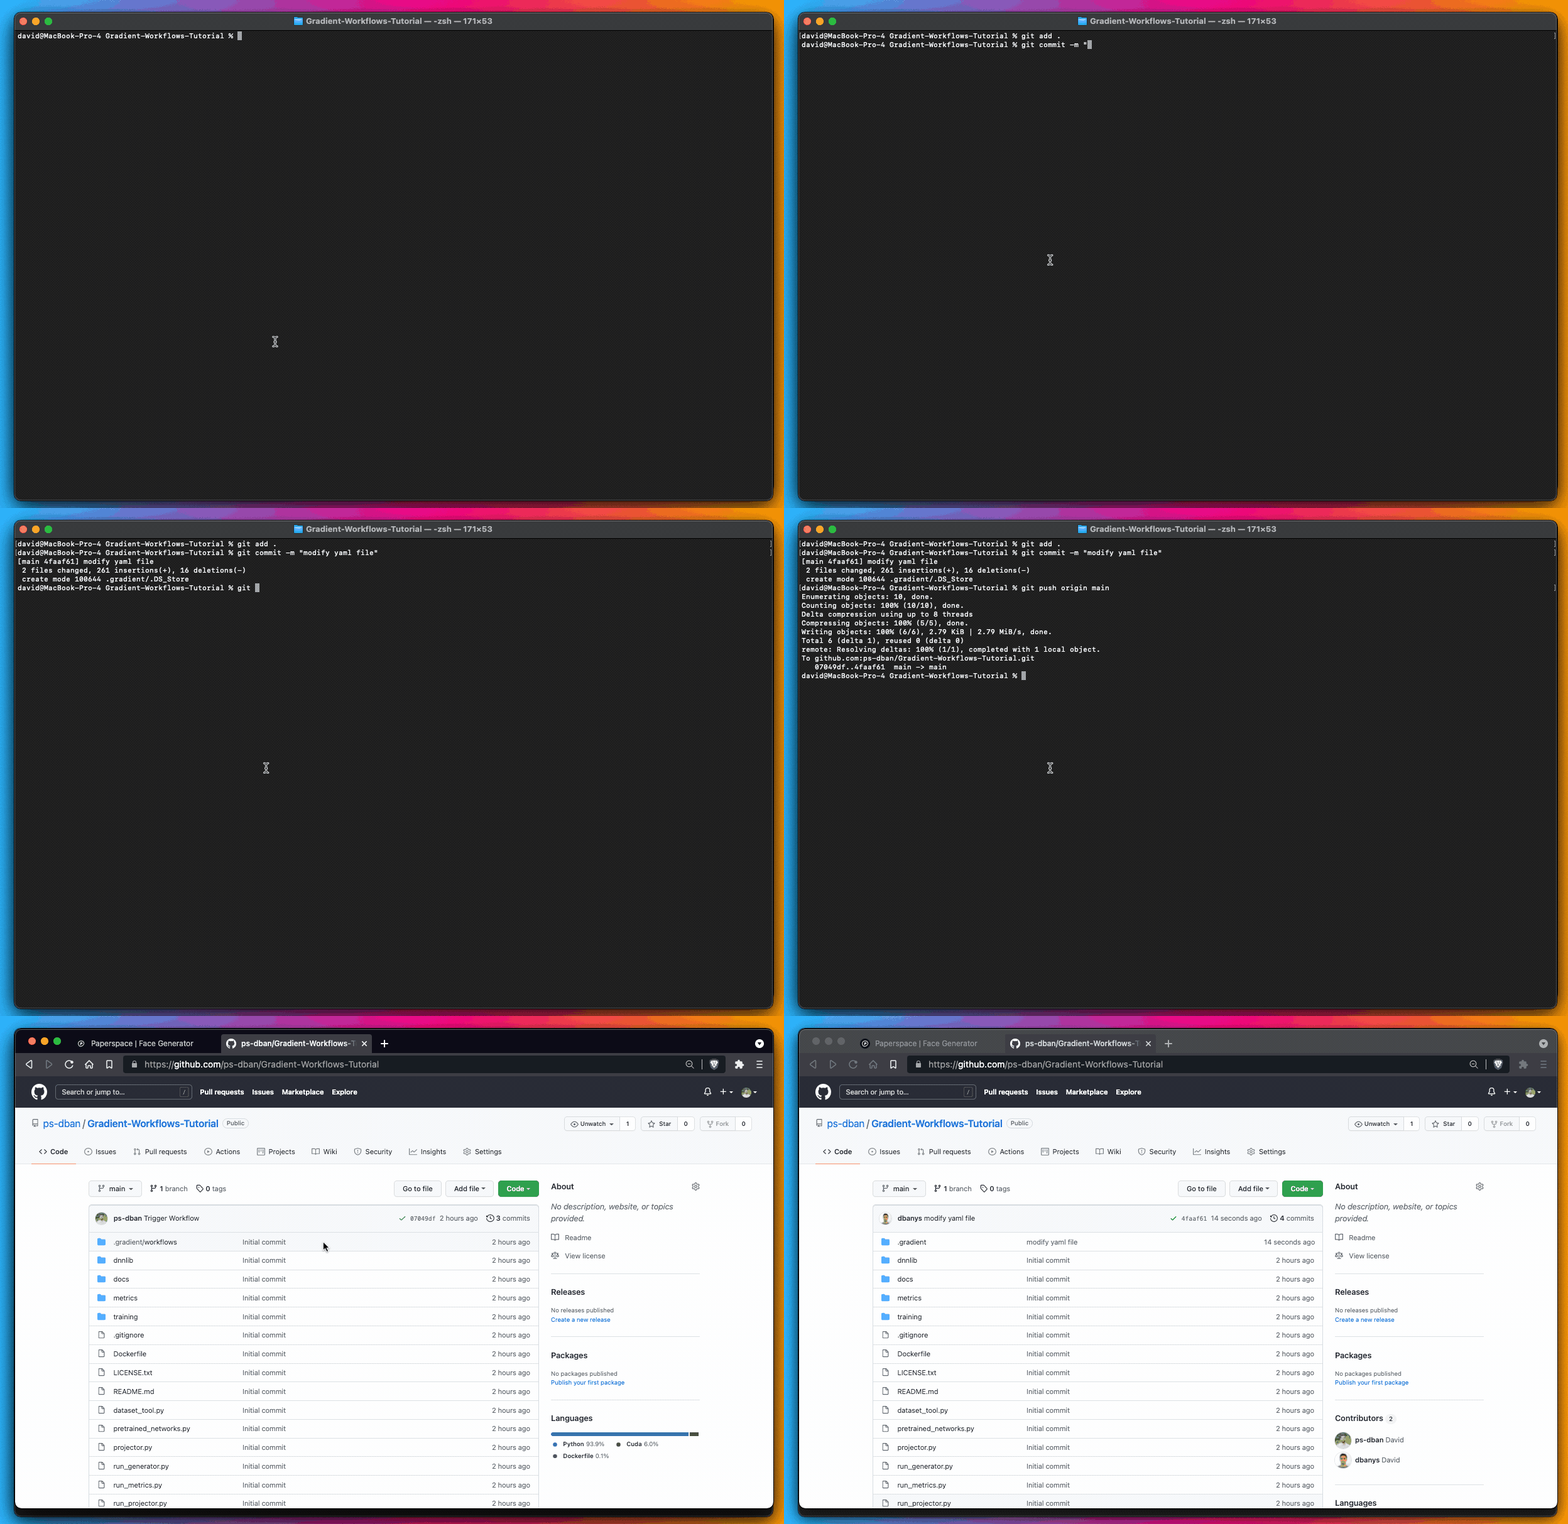
Next, swap back from your GitHub repo to your Gradient console. If everything is working as expected, you should see a new workflow run commence.
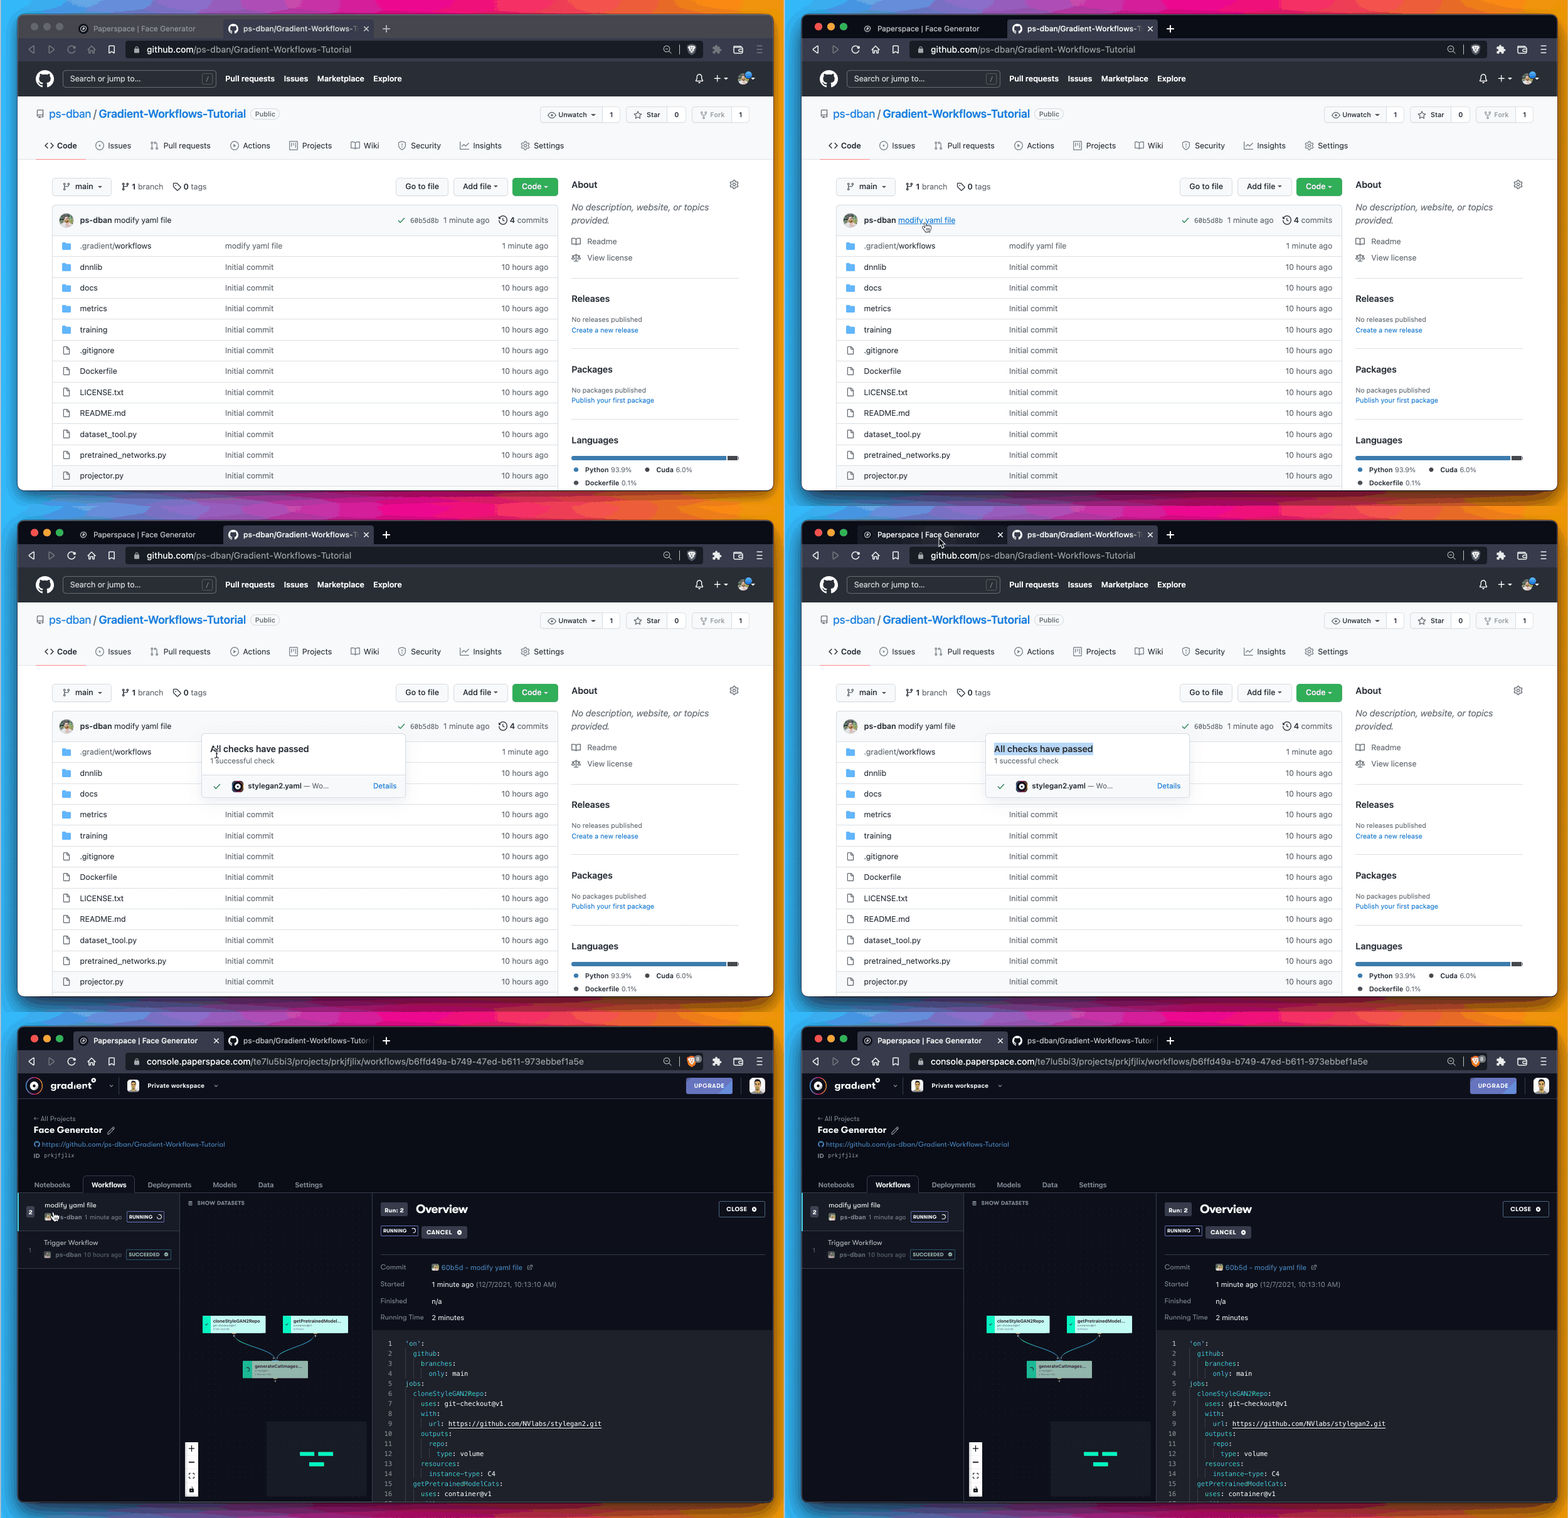
You have successfully pushed code to your remote repo. Pushing this code automatically creates a new workflow run in Gradient.
When your training is done (it took us less than 2 minutes but times may vary), all QTY 3 jobs have succeeded as represented by the green boxes:
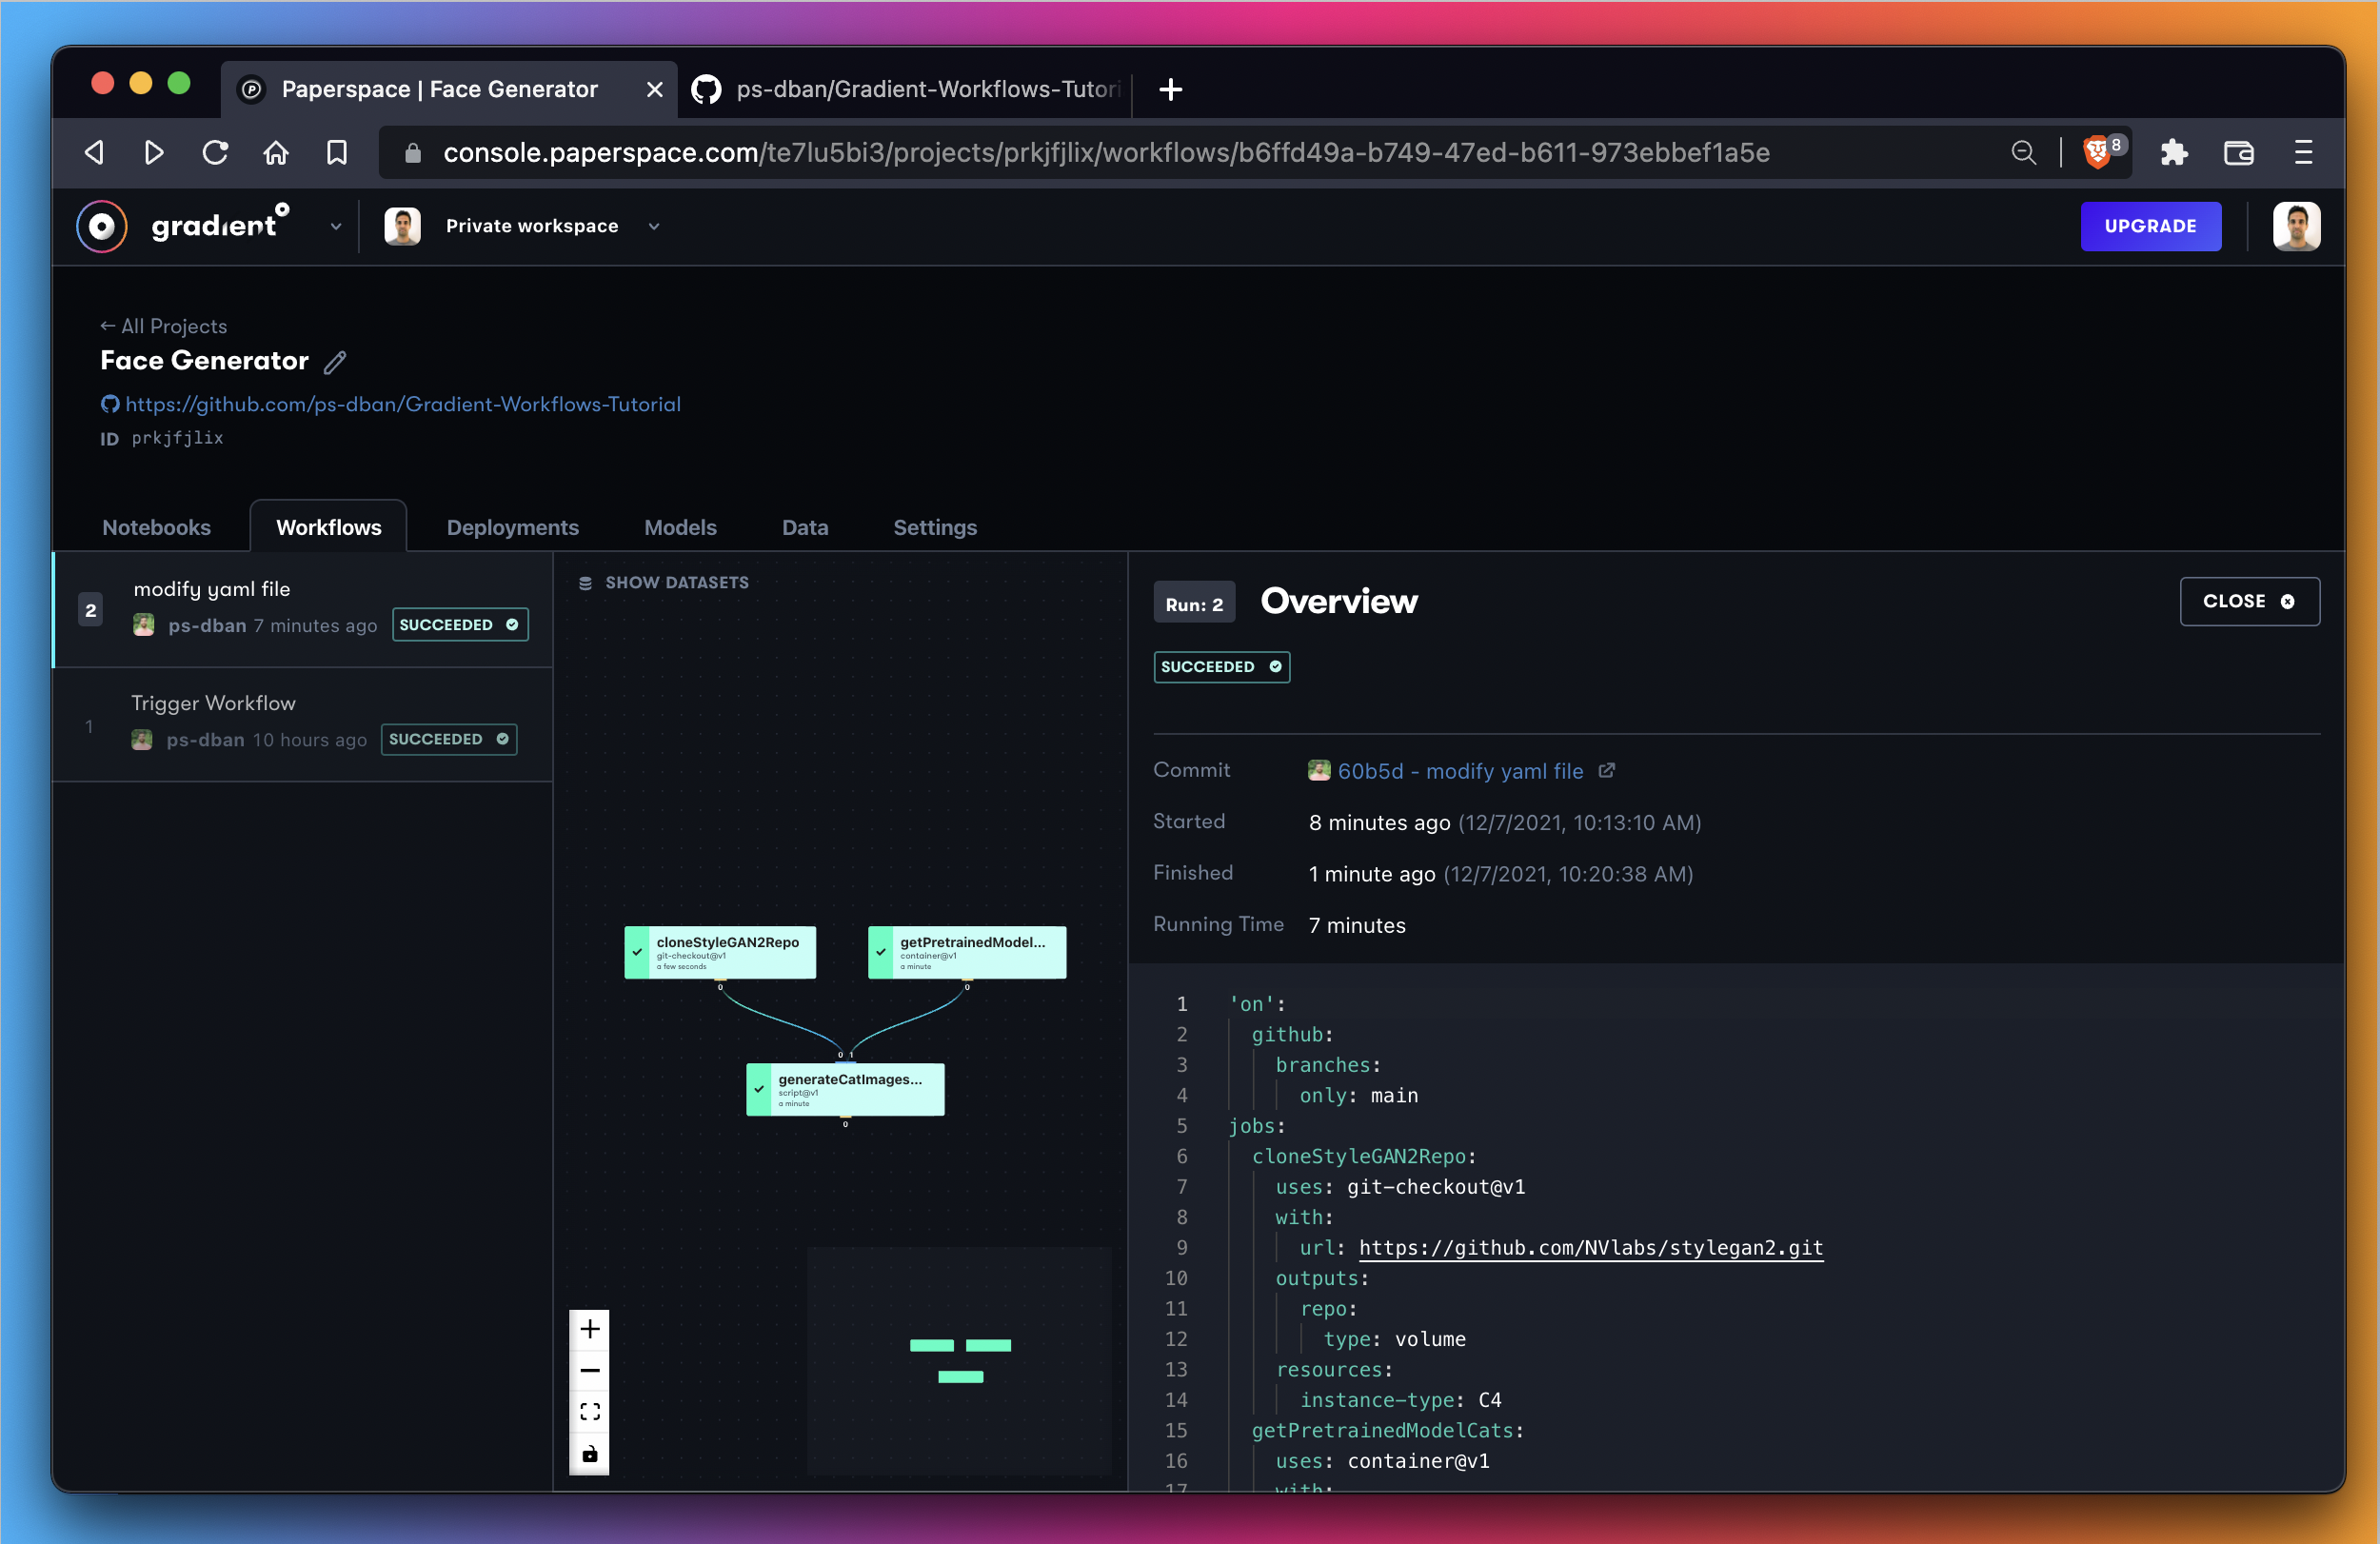
Next, inspect the results of your step called generateCatImagesPretrainedModel – your expectation is to find images of cats within the dataset.
To inspect the generated images, select the box in the DAG that represents the generation step and select the DATA tab to explore the dataset that we’ve generated. Inside, find a number of seed images of cats.
Because this is a deterministic process, the cats you generate should look exactly like these cats.
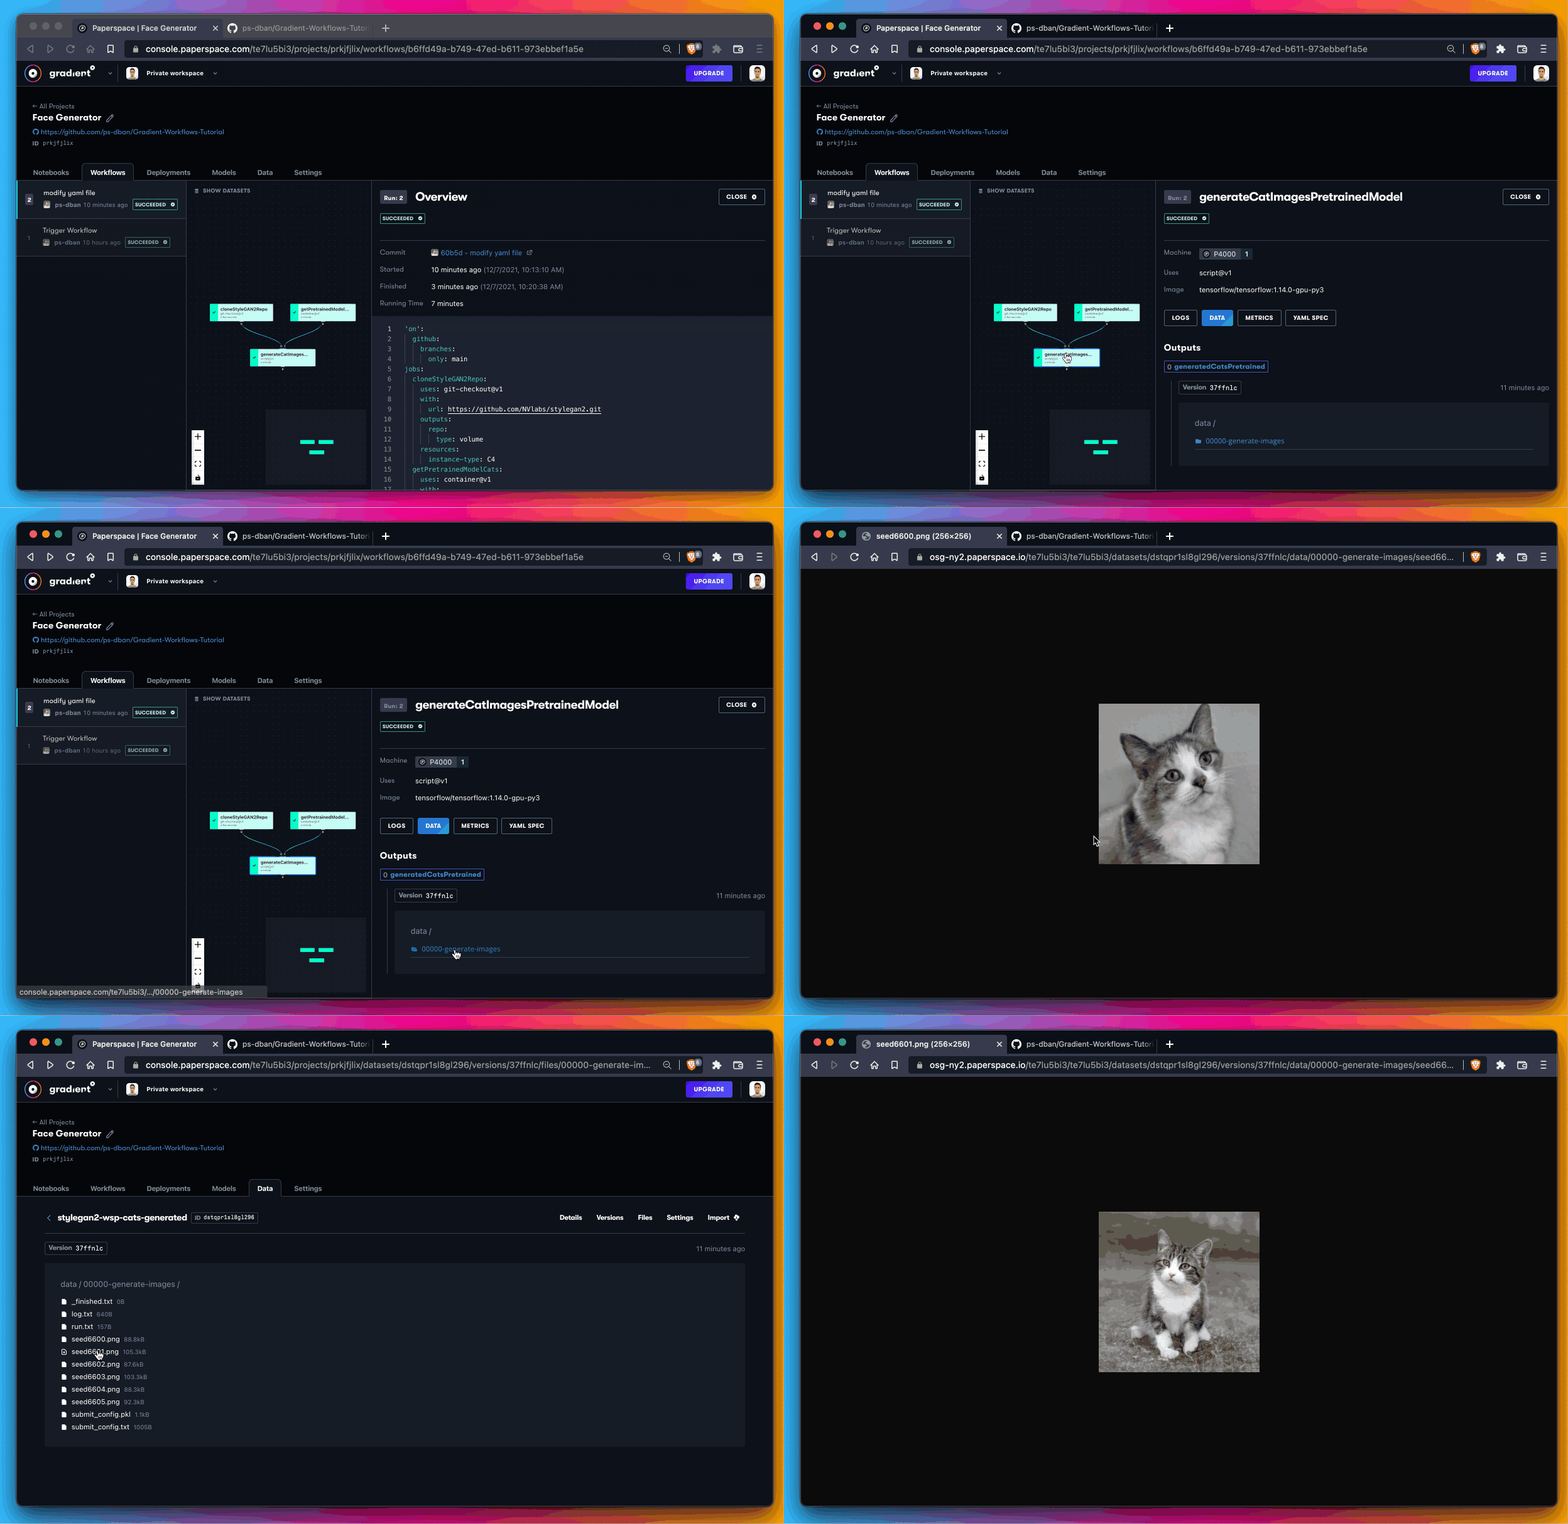
If you look at a number of your seed images, you should see some cats that look exactly like this:

Our next step is to expand this workflow from QTY 3 steps to QTY 5 steps. You can do that by uncommenting steps 4 and 5 from your YAML file to trigger a new workflow run.
Return to your YAML file locally and uncomment steps 4 and 5. This is going to add an addition QTY 2 steps to your workflow and trigger a re-run and the result is that you’re going to also generate some cars.
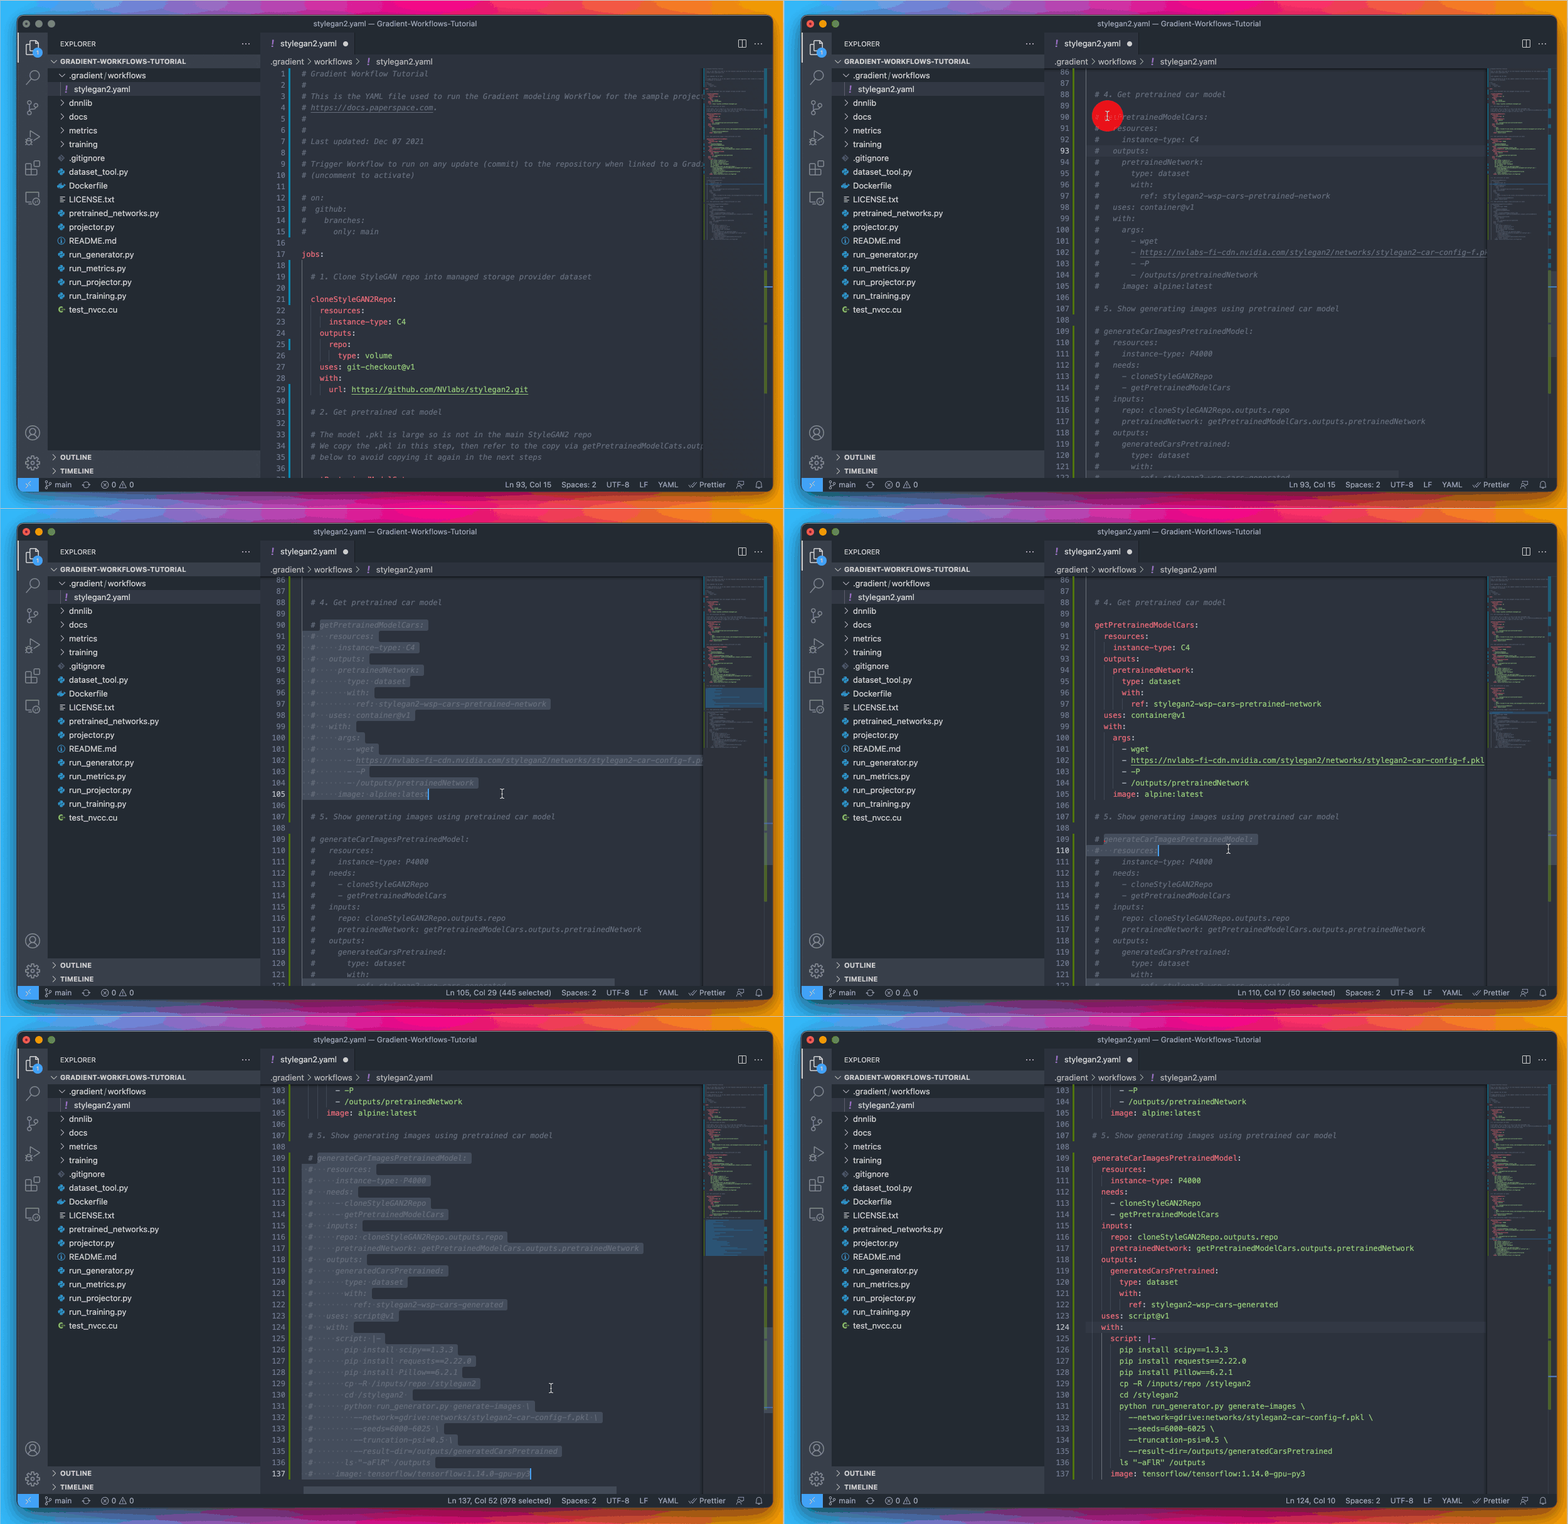
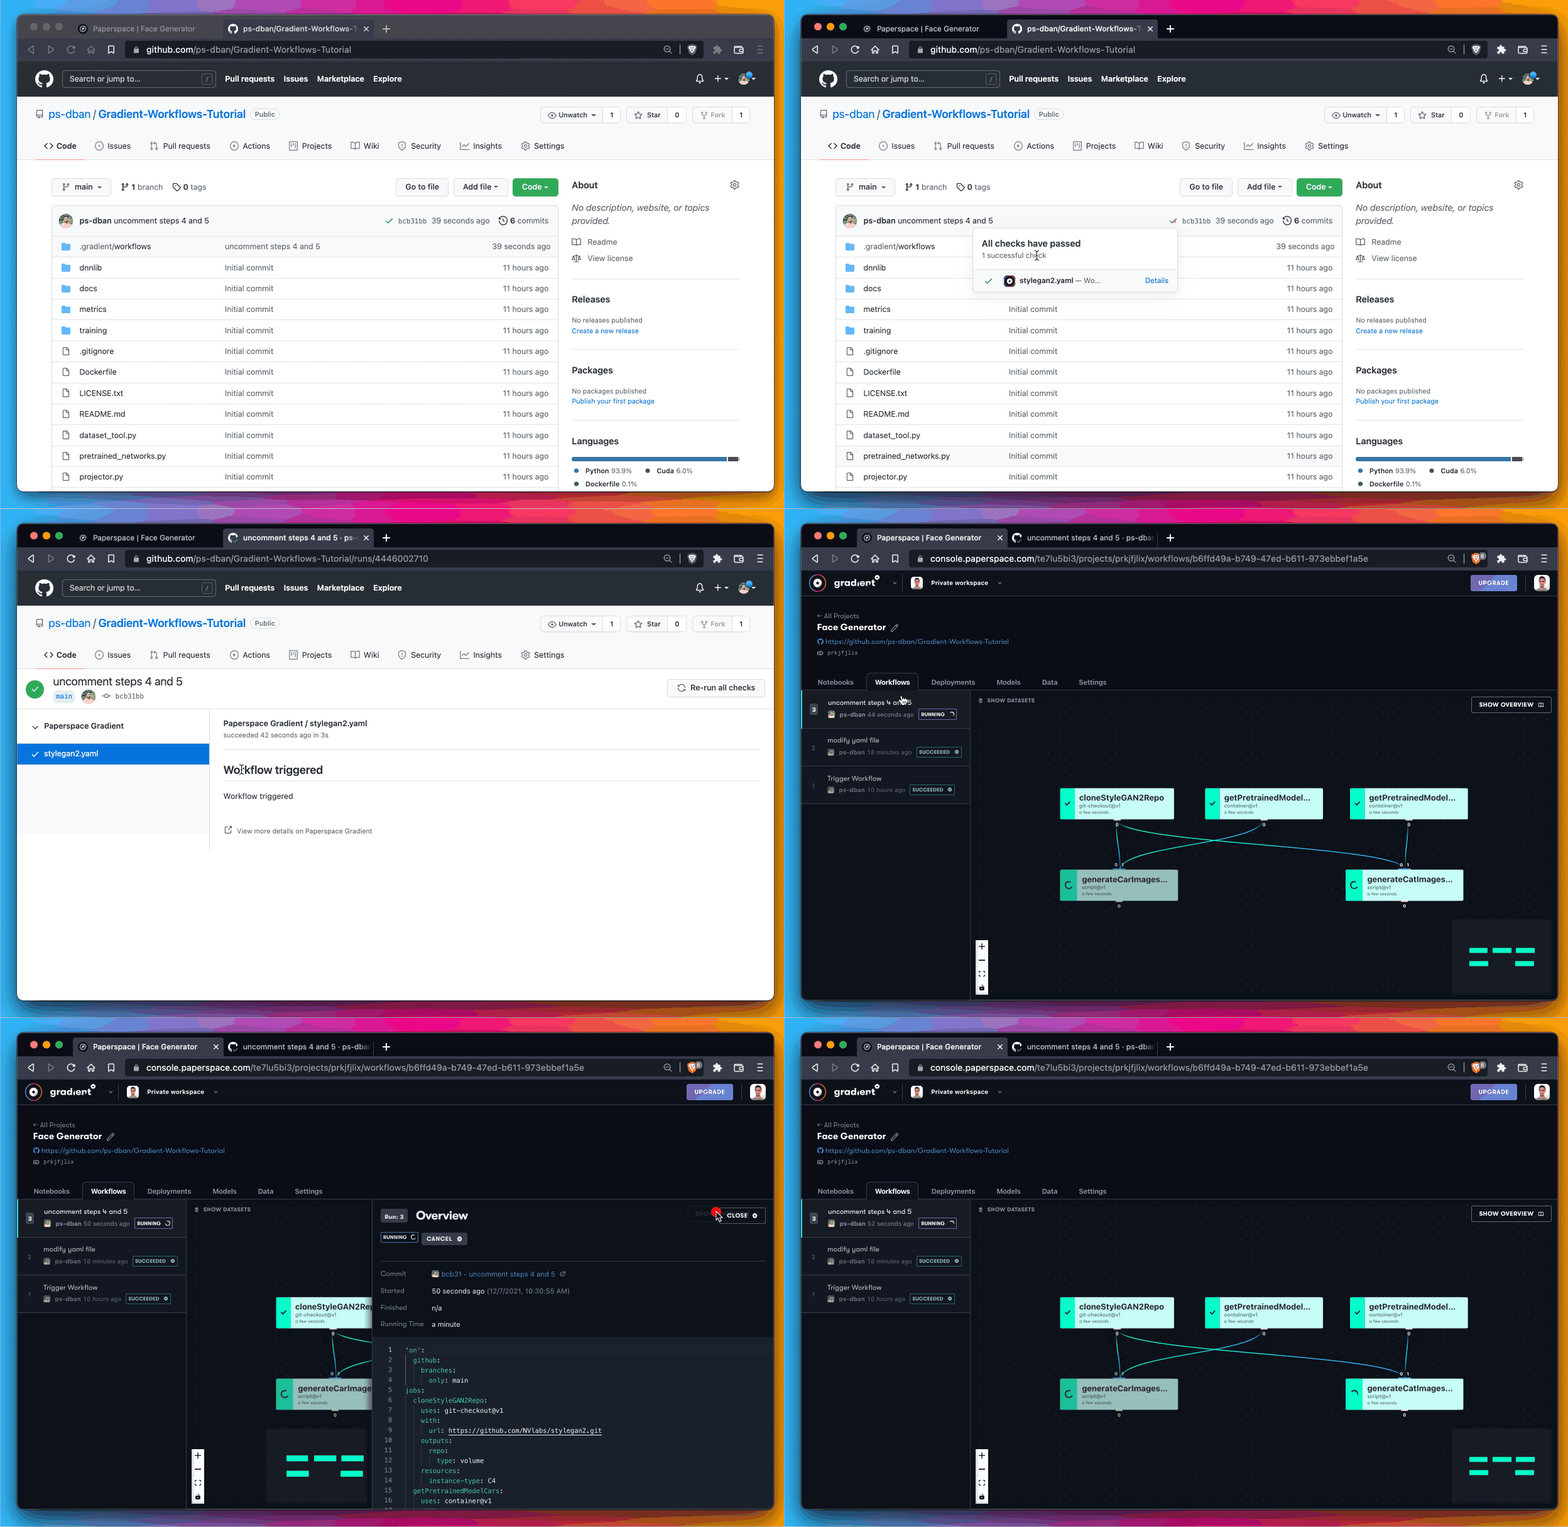
Next, push the changes from your local machine back to your remote repository. Here, give the commit the title uncomment steps 4 and 5.
git add .
git commit -m "uncomment steps 4 and 5"
git push origin main
You should then see this commit hit your GitHub repository. Your checks pass in Gradient, the workflow is triggered, and then swapping over to Gradient, you now have a workflow running with QTY 5 steps in the DAG.
Inspect the results once the workflow has finished. This time it may take a little bit longer since we’ve added two extra steps.
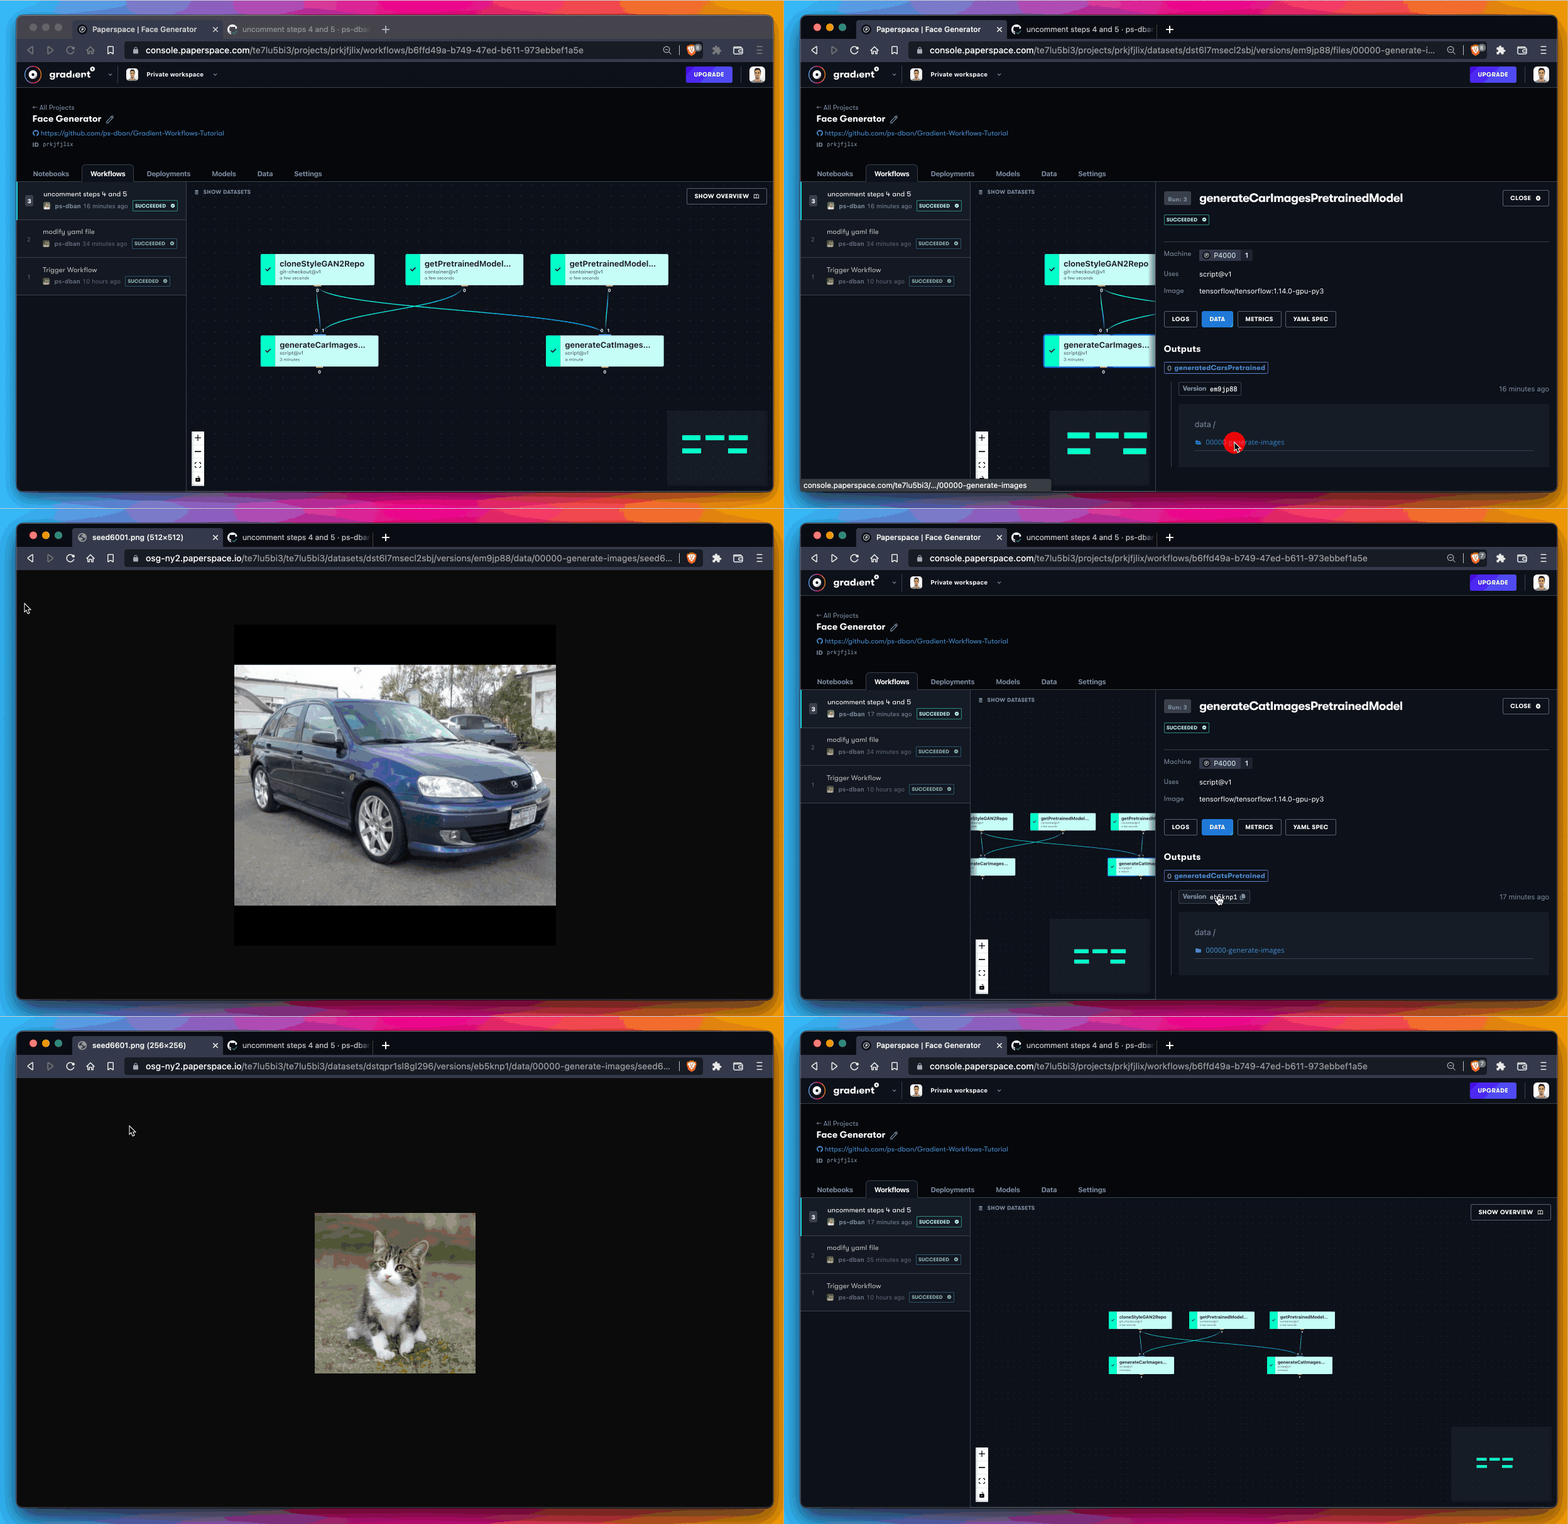
If you’ve succeeded, in addition to your cats, you should now see that you’ve generated a number of cars!

Success once again!
In Part 2 of this tutorial, you’ve managed to do the following:
You’ve now seen how to take a workflow and make changes to the YAML file to add complexity.
From here, you can get started building modifying the YAML spec to build your own Gradient Workflows.
As you develop your own Gradient Workflows, you might notice that a git commit does not trigger a workflow run. When this happens, pay attention to the errors generated in GitHub when making a commit.
If you are successful triggering a workflow run, but the workflow itself is resulting in errors, read through the logs generated in the Gradient console. Remember to inspect each job in the DAG and read the logs independently in order to troubleshoot.