How to Create Projects
Projects let you organize your DigitalOcean resources into groups that fit the way you work. Create projects that align with the applications, environments, and clients that you host on DigitalOcean.
All of the DigitalOcean resources in your account start in a single default project. You can create additional projects and move resources between them to organize your resources in ways that align with how you use them.
Create a Project Using the Control Panel
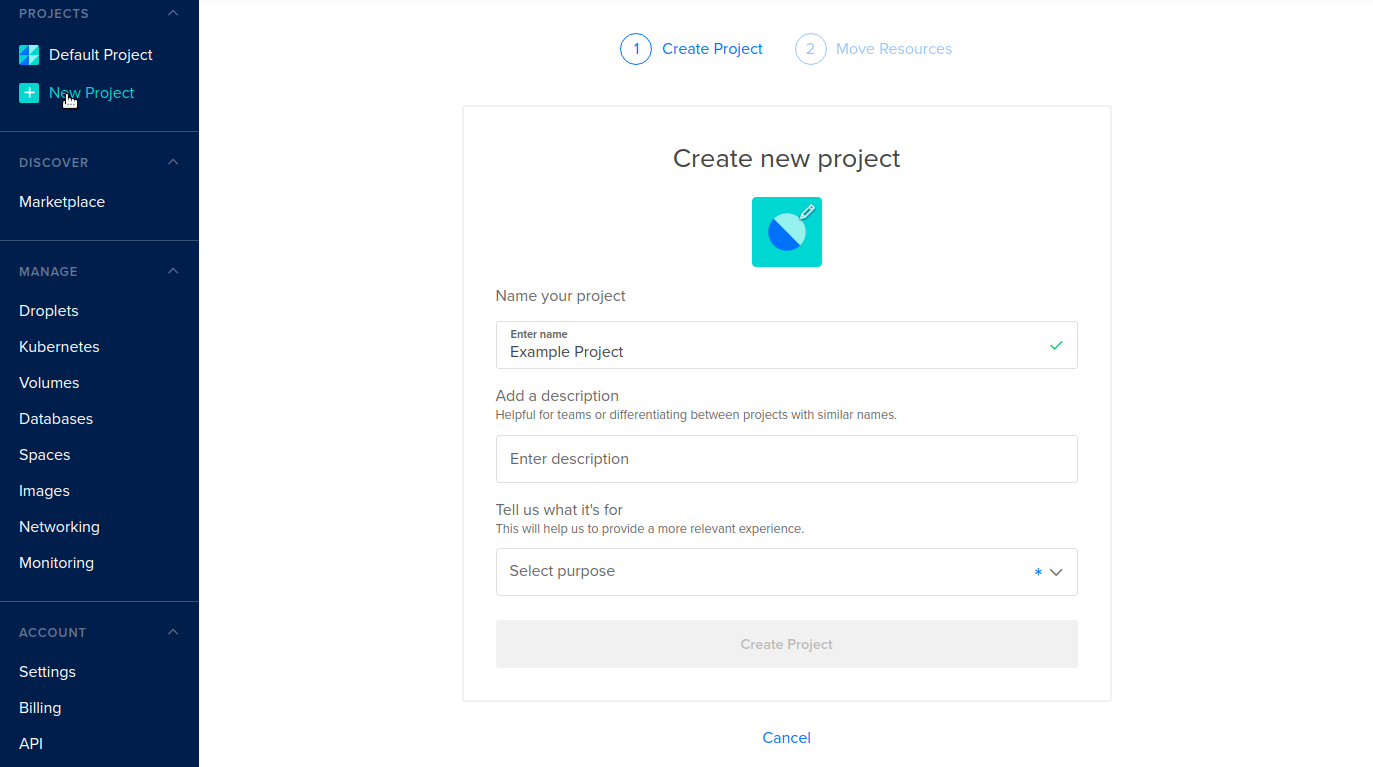
In the control panel’s main menu, under the Projects section, click + New Project to open the project creation page.

On the Create new project page, enter the name, description, and purpose of the project. You can change any project setting later by returning to the Settings tab.
-
Name your project (required). The project name is meant to be human-readable, so you can include spaces and special characters.
-
Add a description (optional). The project’s description appears at the top of all of all project pages, beneath the project’s name.
The description can be up to 255 characters long (including spaces). The first 97 characters are displayed on the page heading.
-
Tell us what it’s for? (required). This field lets us show relevant tips and tutorials for your use case. There are several common purposes in the list, but you can choose Other to describe it yourself.
The purpose can be up to 199 characters long. If you enter a longer description, you receive an error when you click Create Project.
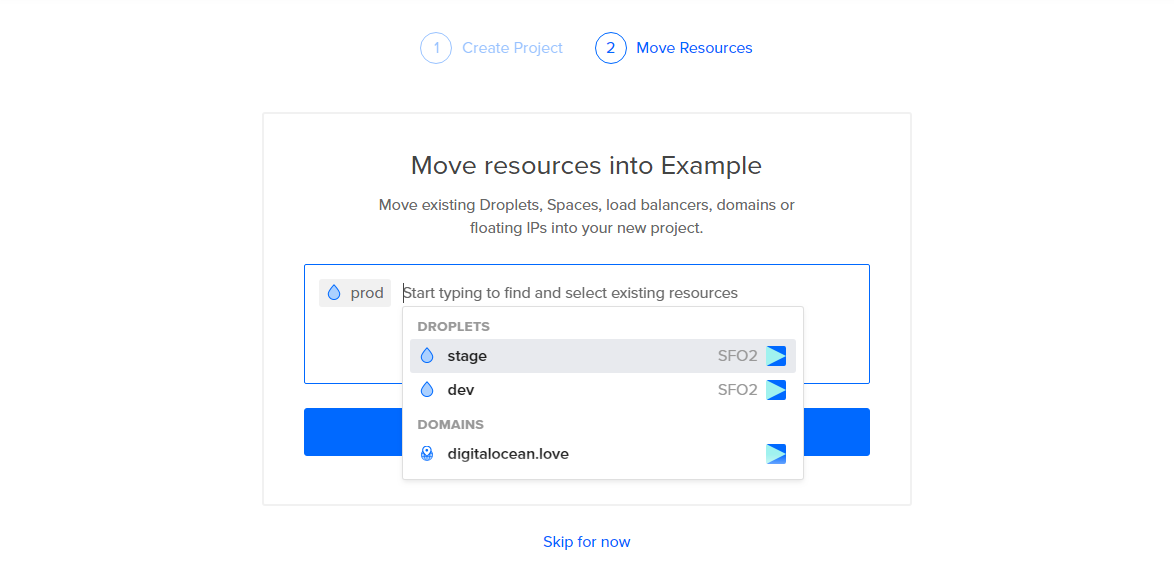
When you’re done, click Create Project to go to the Move Resources page. Here, you can optionally move existing resources into the new project.

When you click into the text area, a list of all movable resources from other projects appears. You can keep typing to filter the list. Click the names of the resources you want to move, then click the Move Resources button. If you choose Skip for now, you can move resources in later.
Either choice finalizes the creation of your project and redirects you to the Resources tab of the new project.

Resources you add appear on the Resources tab, grouped by type.